How to Log In and Verify your Account on Bitget
In the realm of cryptocurrency exchanges, Bitget shines as a platform that prioritizes security and user verification. Before diving into the world of trading, users must navigate the process of logging in and verifying their accounts on Bitget, ensuring a secure and compliant experience within the platform.
How to Log In Account on Bitget
How to Log In to Bitget
How to Log In to Bitget using Email or Phone Number
I will show you how to login to Bitget and start trading in a few simple steps.Step 1: Register for a Bitget account
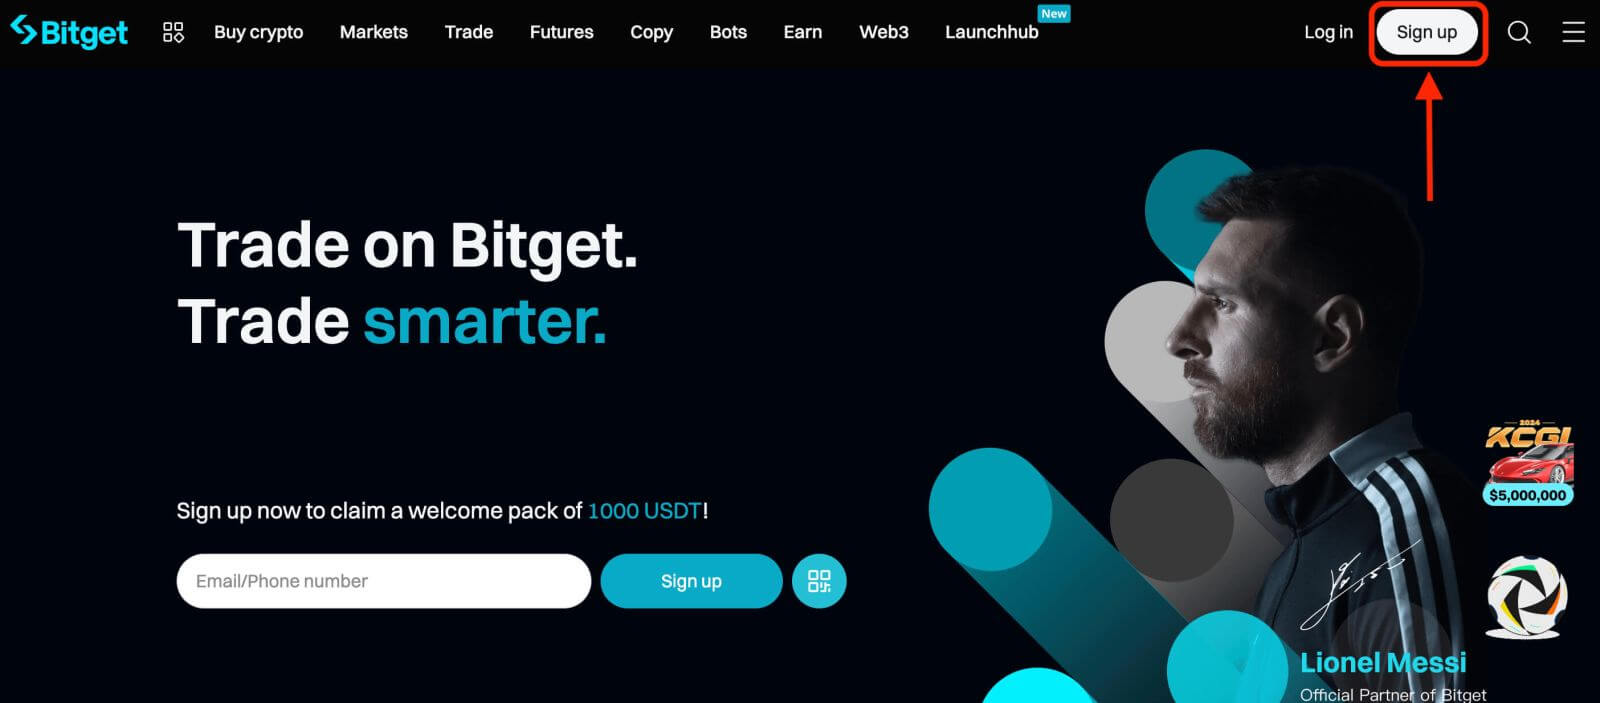
To begin, you can login to Bitget, you need to register for a free account. You can do this by visiting the website of Bitget and clicking on "Sign up".
Step 2: Login to your account
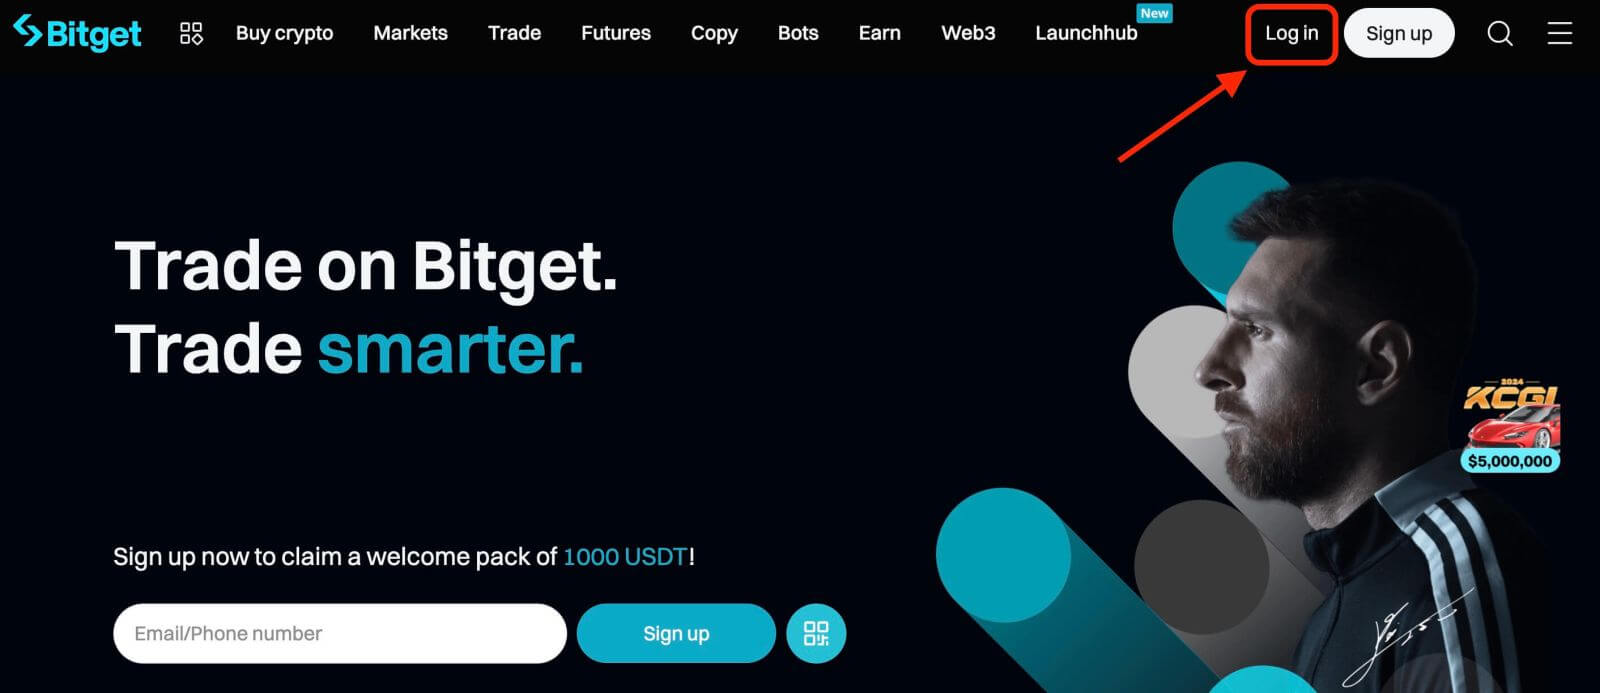
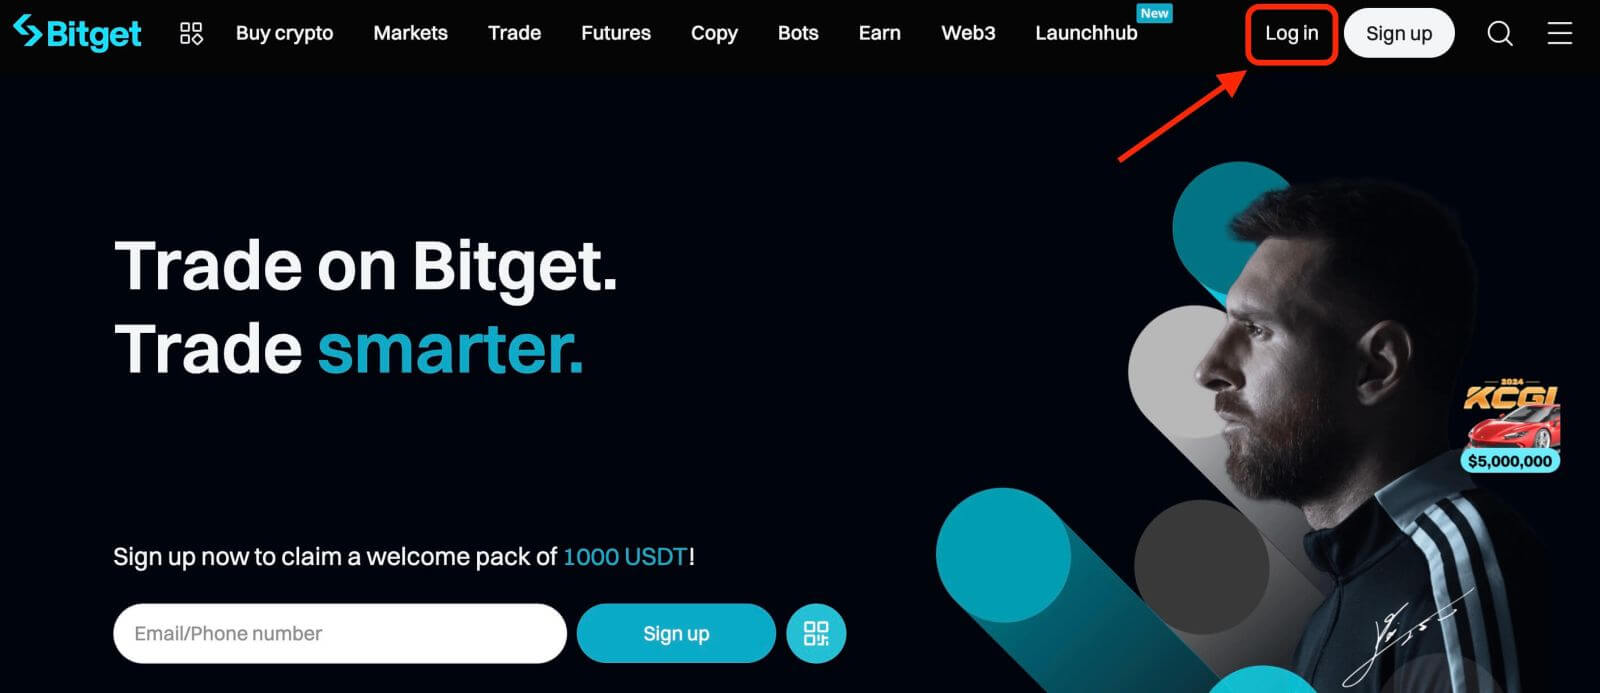
Once you have registered for an account, you can login to Bitget by clicking on "Log in" button. It is typically located in the upper right-hand corner of the webpage.
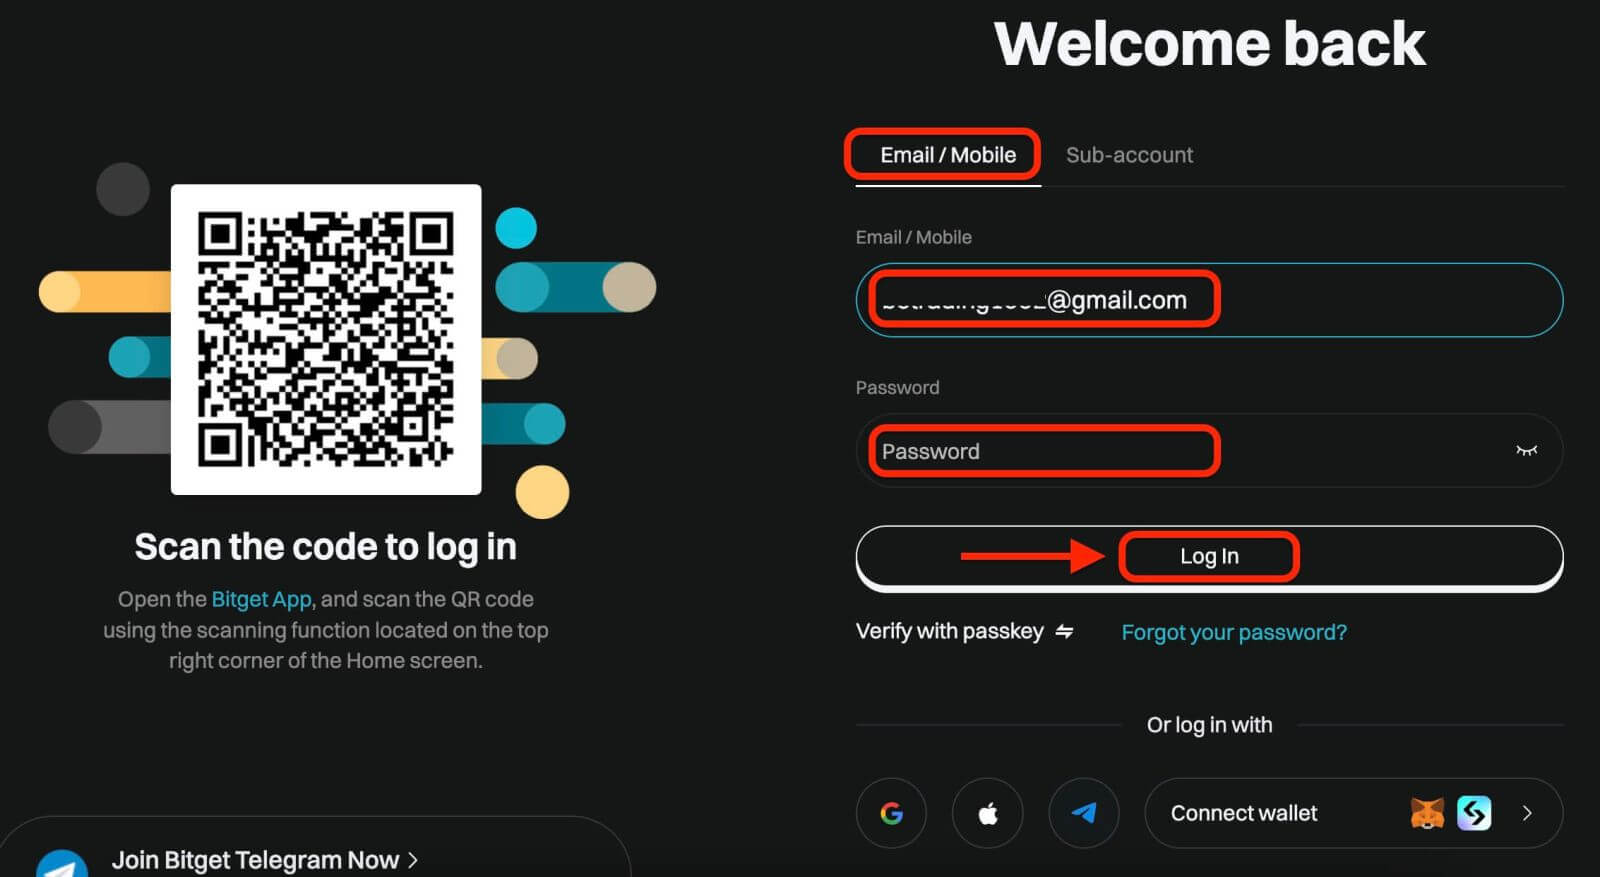
A login form will appear. You will be prompted to enter your login credentials, which include your registered email address or phone number and password. Ensure that you enter this information accurately.
Step 3: Complete the puzzle and enter the digit email verification code
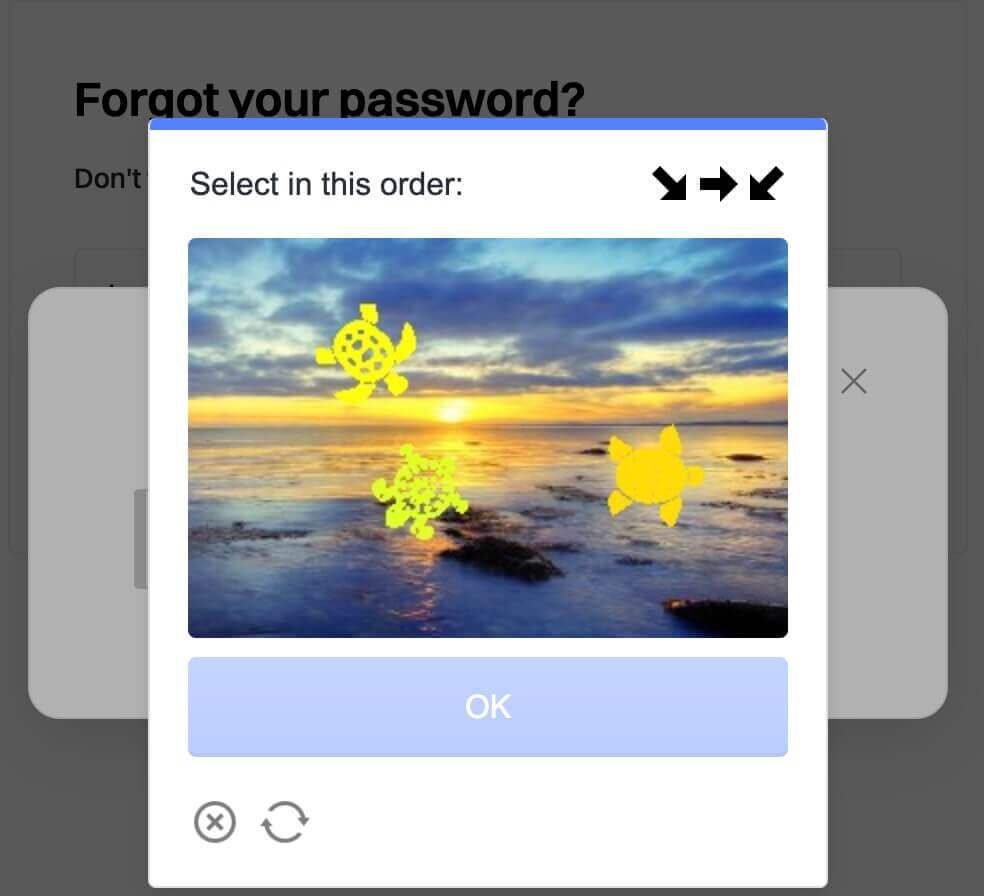
As an additional security measure, you may be required to complete a puzzle challenge. This is to confirm that you are a human user and not a bot. Follow the on-screen instructions to complete the puzzle.
Step 4: Start trading
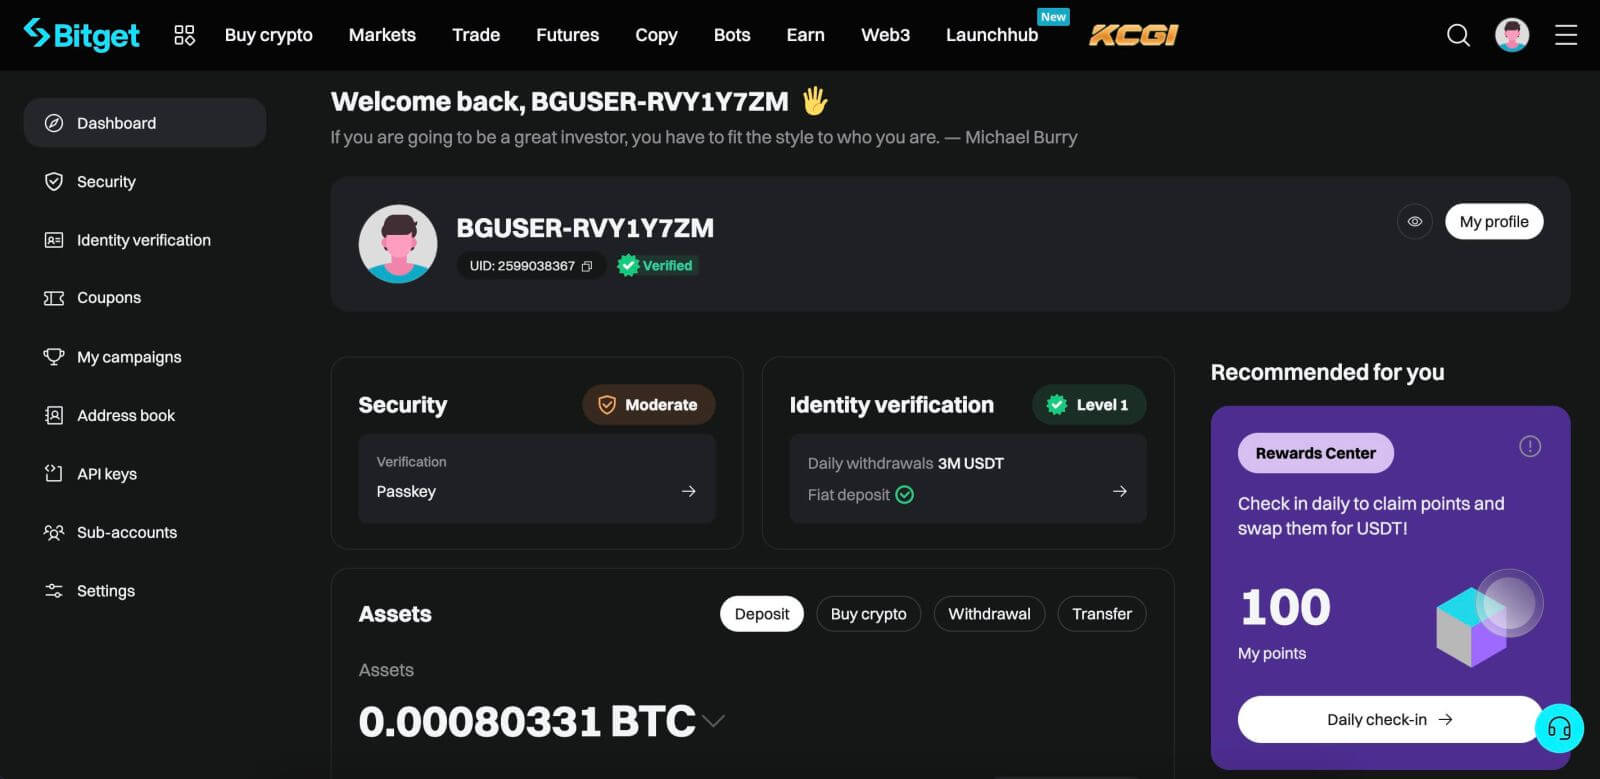
Congratulations! You have successfully logged in to Bitget with your Bitget account and you will see your dashboard with various features and tools.
How to Log In to Bitget using Google, Apple, MetaMask, or Telegram
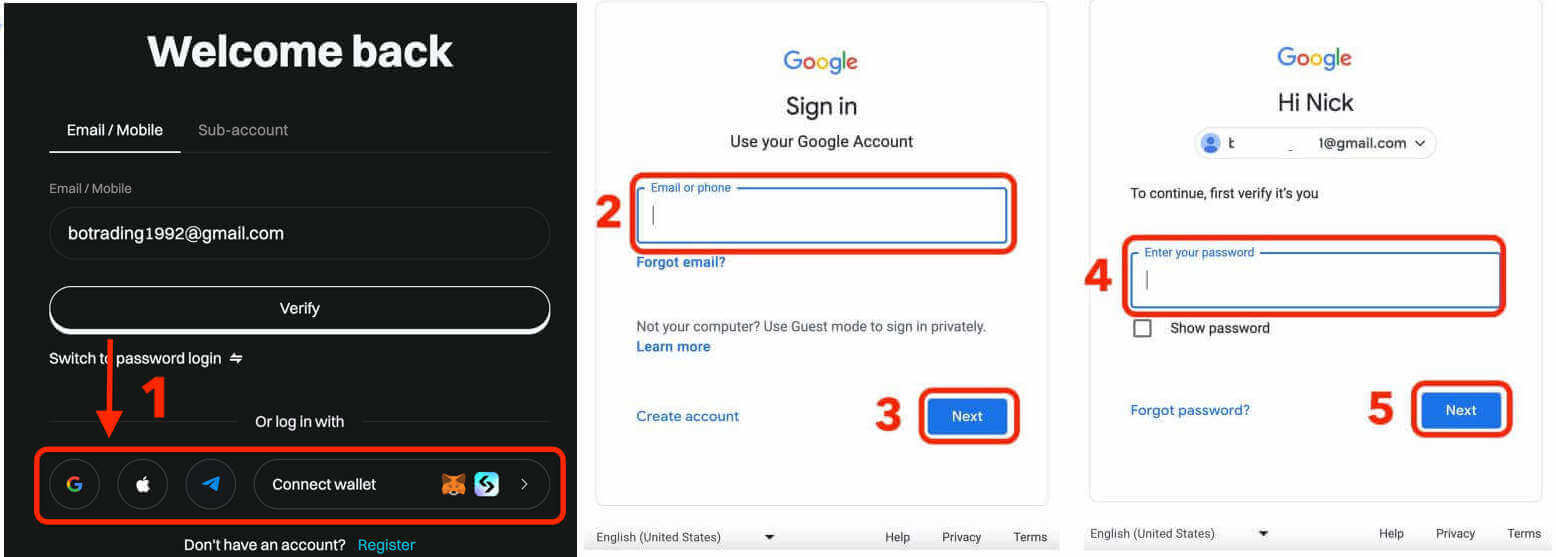
Bitget offers the convenience of logging in using your social media account, streamlining the login process and providing an alternative to traditional email-based logins.- We are using a Google account as an example. Click [Google] on the sign-in page.
- If you are not already logged in to your Google account on your web browser, you will be redirected to the Google sign-in page.
- Enter your Google account credentials (email address and password) to log in.
- Grant Bitget the necessary permissions to access your Google account information, if prompted.
- After a successful login with your Google account, you will be granted access to your Bitget account.
How to Log In to the Bitget app
Bitget also offers a mobile app that allows you to access your account and trade on the go. The Bitget app offers several key features that make it popular among traders.Step 1: Download the Bitget app for free from the Google Play Store or App Store and install it on your device.
Step 2: After downloading the Bitget App, open the app.
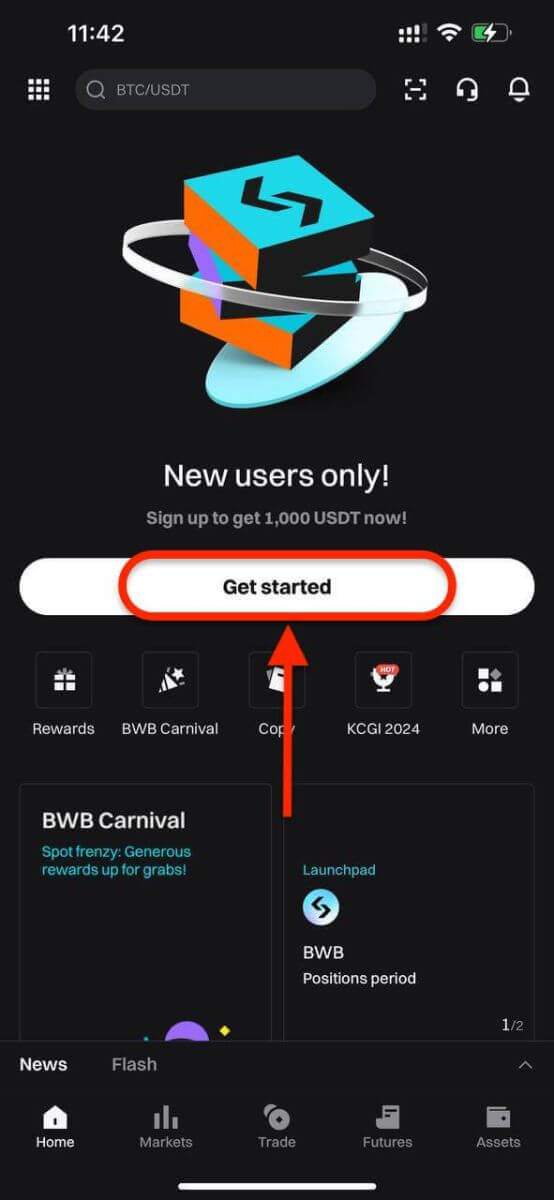
Step 3: Then, tap [Get started].
Step 4: Enter your mobile number or email address based on your selection. Then enter your account password.
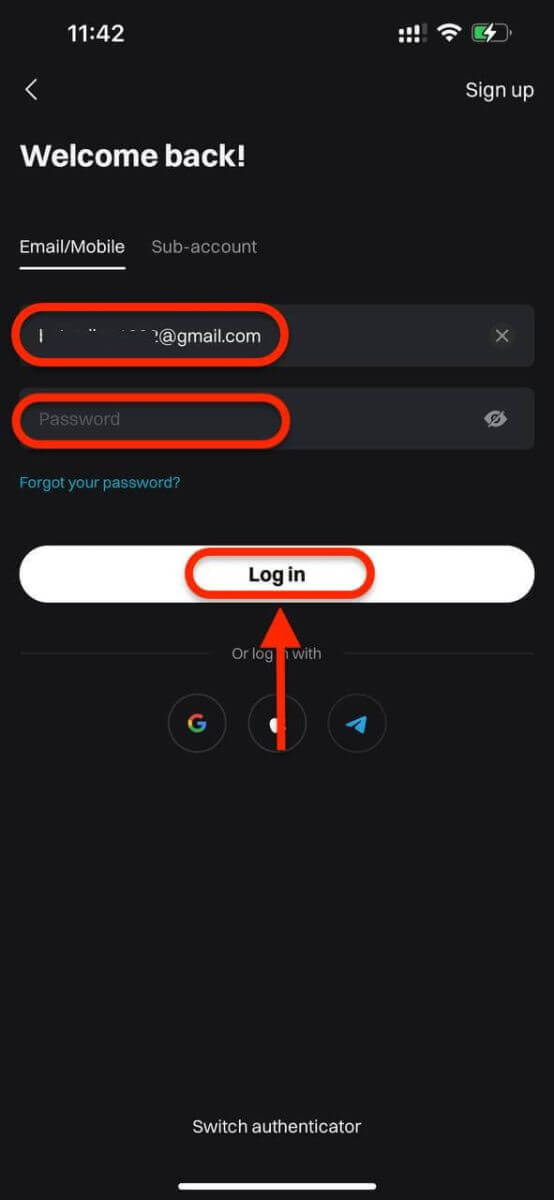
Step 5: That’s it! You have successfully logged in to the Bitget app.
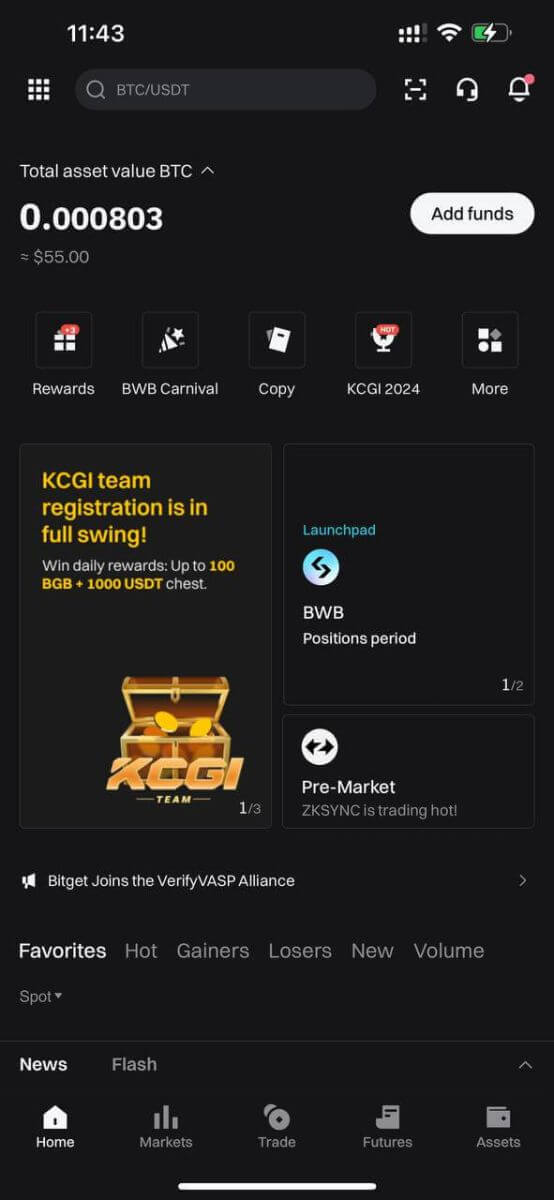
Two-Factor Authentication (2FA) on Bitget Login
Bitget prioritizes security as a top focus. Utilizing Google Authenticator, it adds an additional security layer to safeguard your account and prevent potential asset theft. This article provides a guide on binding Google 2-Step Verification (2FA).
Why use Google 2FA
Google Authenticator, an app by Google, implements two-step verification through time-based one-time passwords. It generates a 6-digit dynamic code that refreshes every 30 seconds, each code usable only once. Once linked, you’ll need this dynamic code for activities like login, withdrawals, API creation, and more.
How to Bind Google 2FA
The Google Authenticator app can be downloaded from the Google Play Store and Apple App Store. Go to the store and search for Google Authenticator to find and download it.If you already have the app, let’s check out how to bind it to your Bitget account.
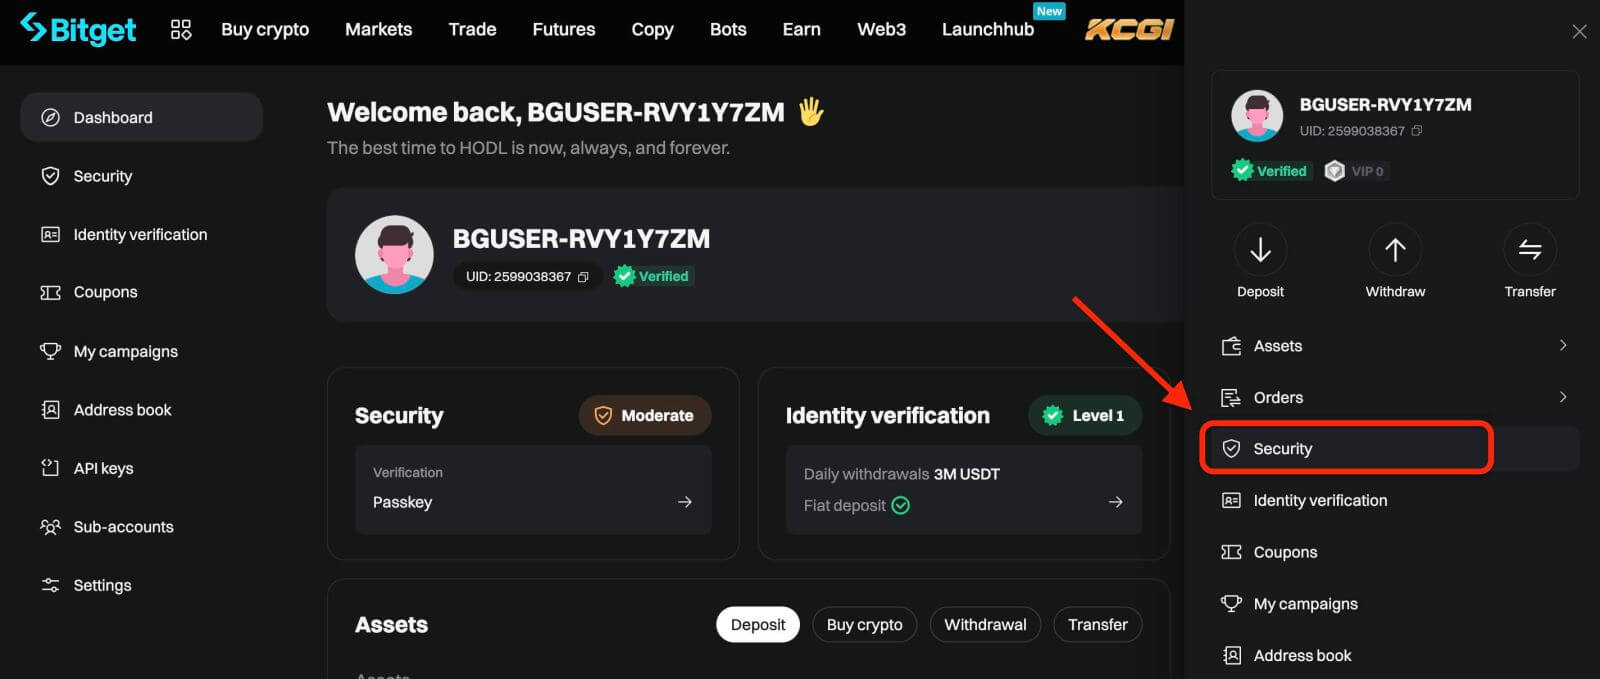
Step 1: Log in to your Bitget account. Click the avatar on the upper-right corner and select Security in the drop-down menu.
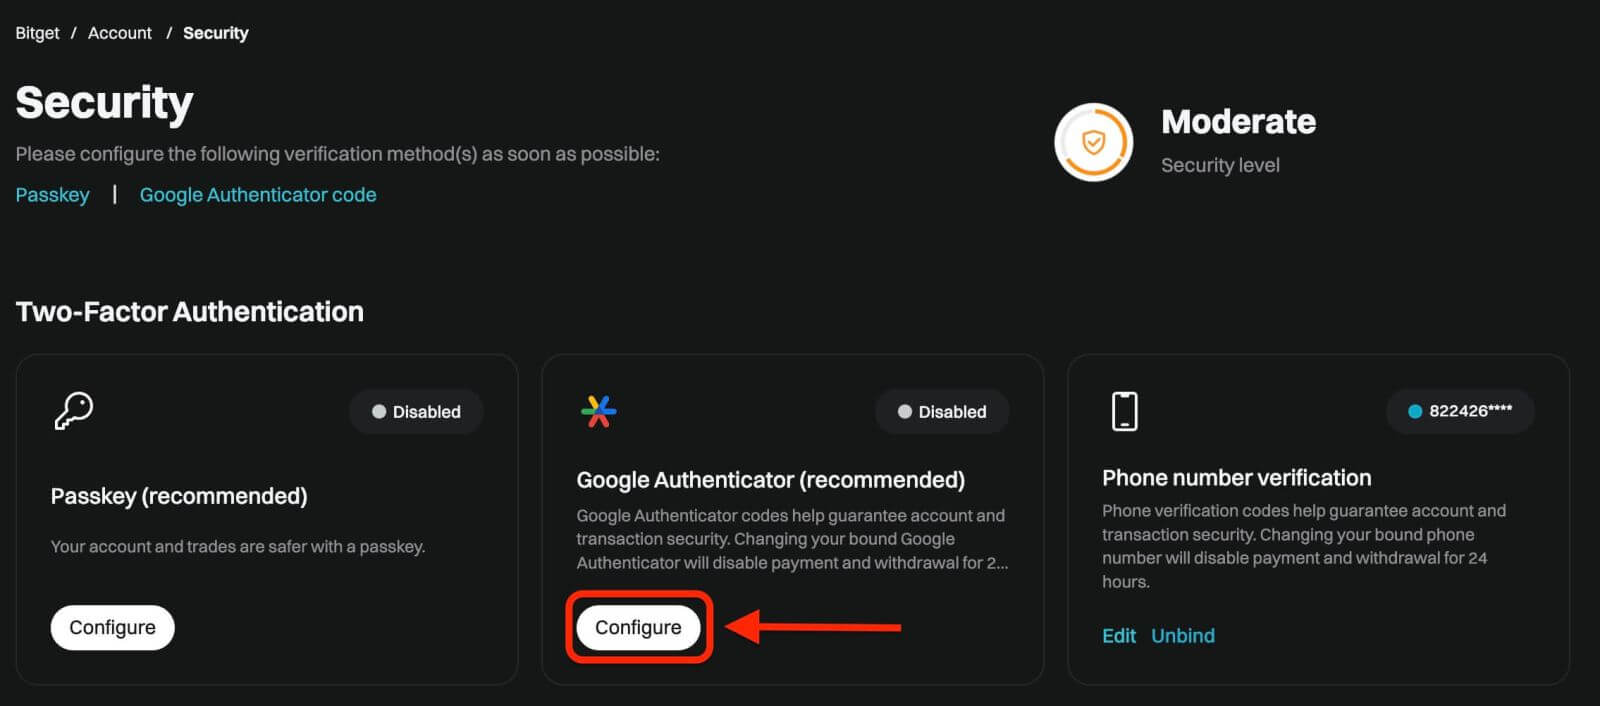
Step 2: Find Security Settings, and click "Configure" of Google Authenticator.
Step 3: Next, you will see a page below. Please record the Google Secret Key and store it in a secure place. You will need it to restore your Google 2FA if you lose your phone or accidentally delete the Google Authenticator app.
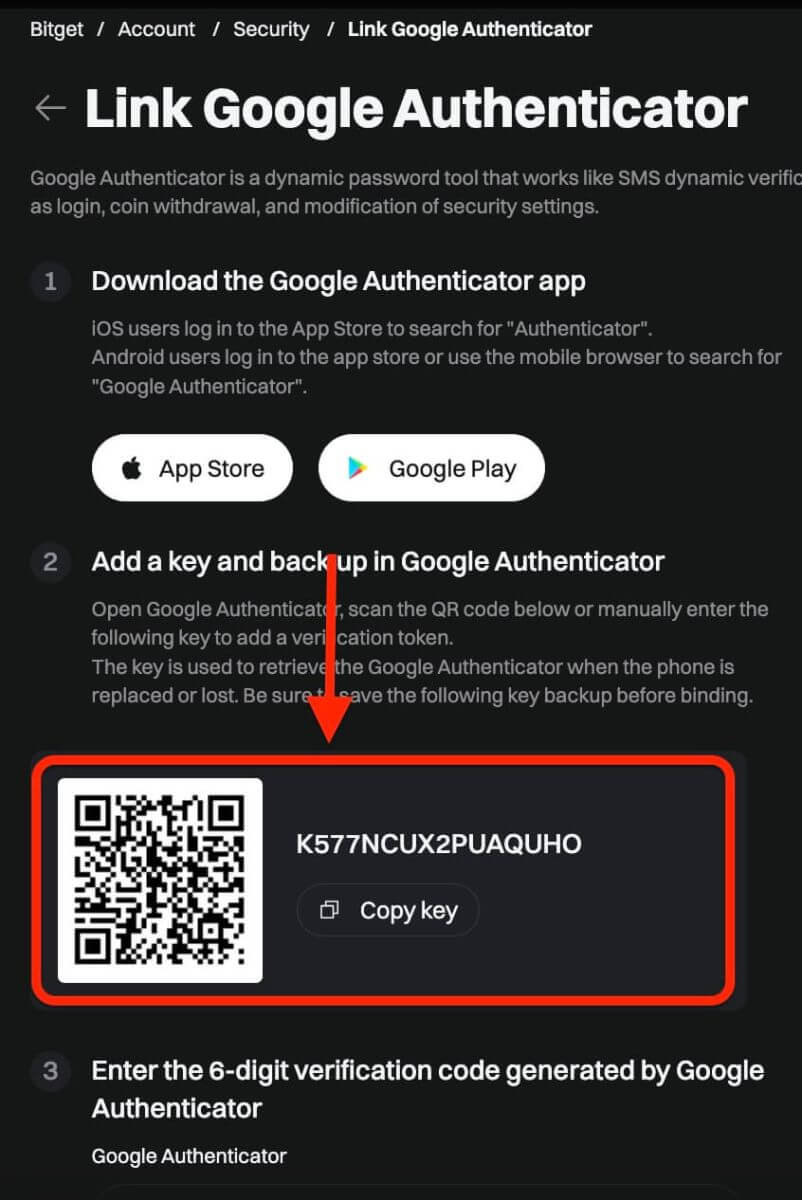
Step 4: Once you have saved the Secret Key, open the Google Authenticator app on your phone
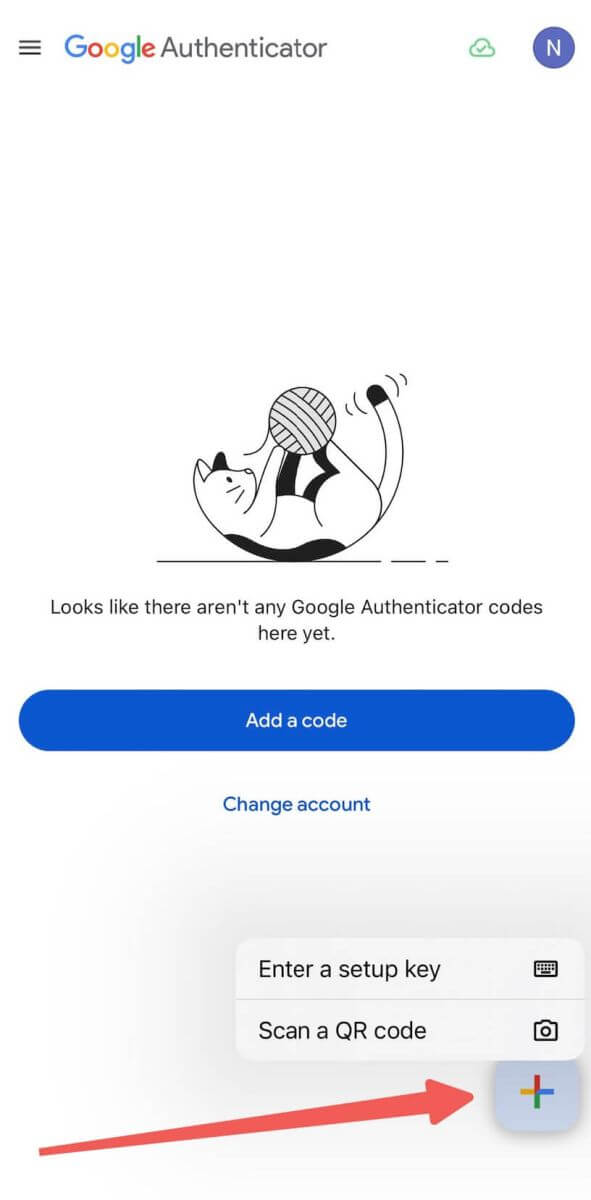
1) Click the "+" icon to add a new code. Click on Scan barcode to open your camera and scan the code. It will set up the Google Authenticator for Bitget and start generating the 6-digit code.
2) Scan the QR code or manually enter the following key to add a verification token.
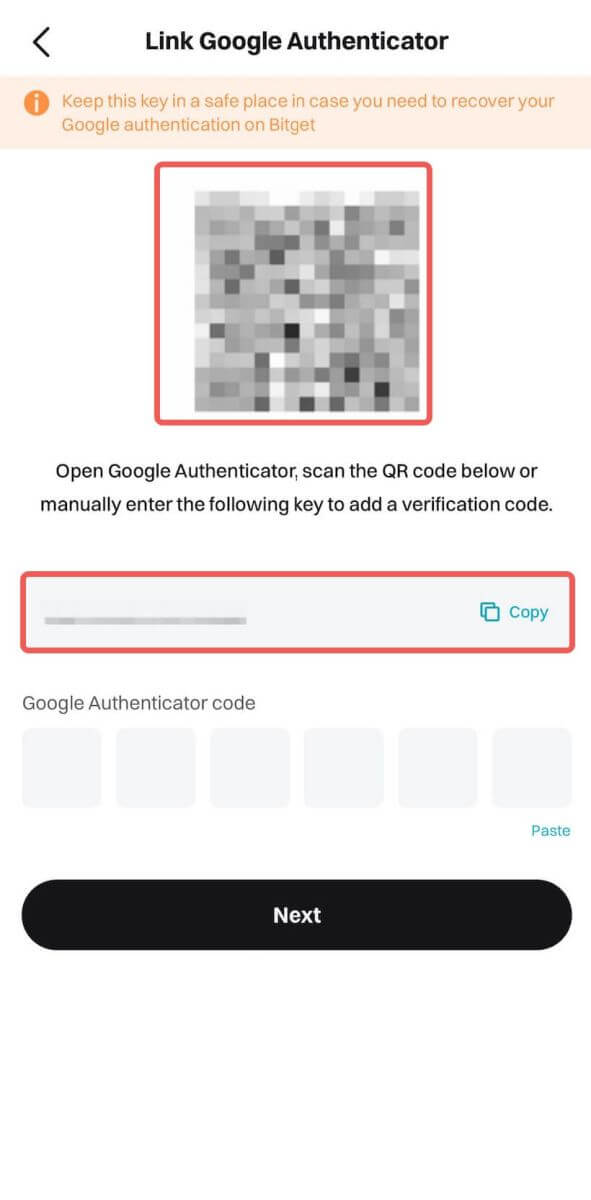
Note: If both your Bitget APP and GA app are on the same phone device, it is difficult to scan QR code. Therefore, it is best to copy and enter the setup key manually.
Step 5: Lastly, copy and enter the new 6-digit verification code in Google Authenticator.
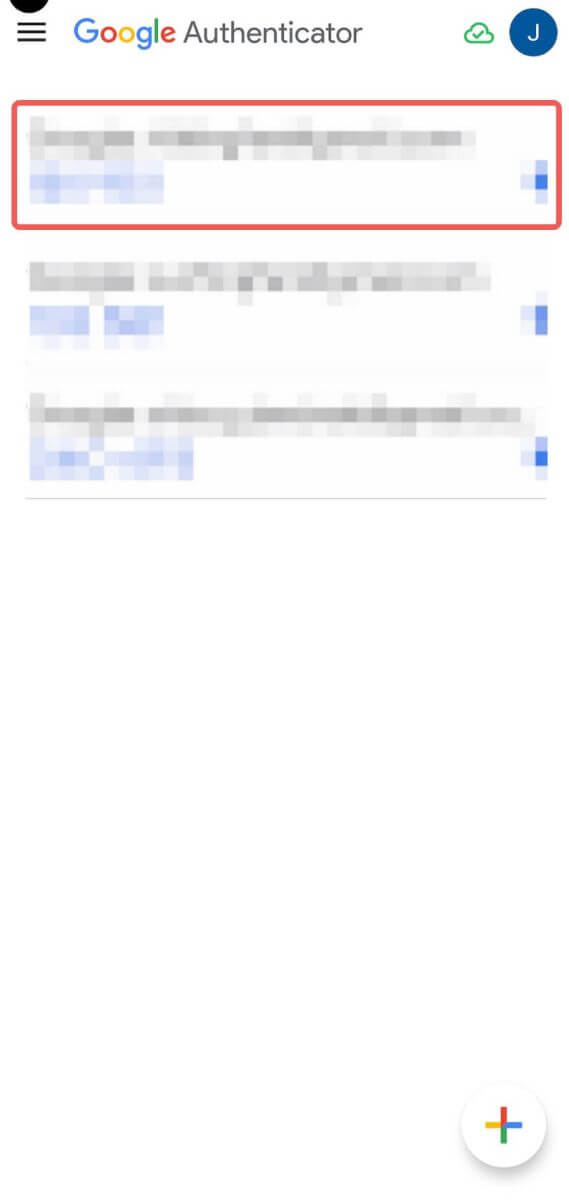
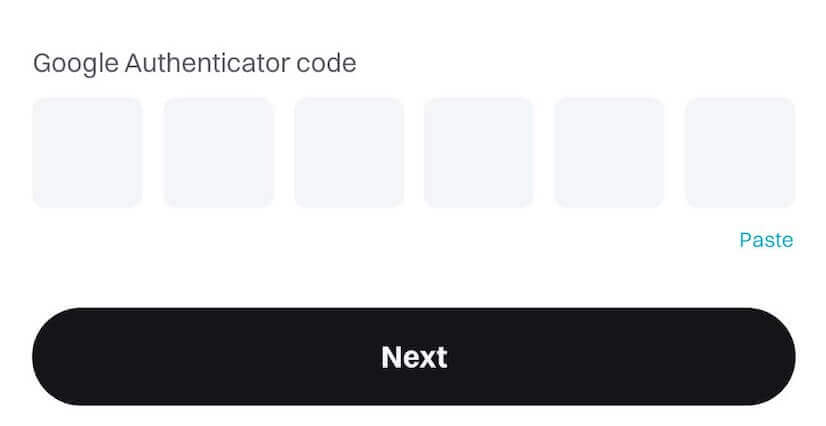
And now, you have successfully linked Google Authentication (GA) to your Bitget account.
- Users must input the verification code for login, trading, and withdrawal processes.
- Avoid removing Google Authenticator from your phone.
- Ensure the accurate entry of the Google 2-step verification code. After five consecutive incorrect attempts, Google 2-step verification will be locked for 2 hours.
How to Reset Bitget Password
If you’ve forgotten your Bitget password or need to reset it for any reason, don’t worry. You can easily reset it by following these simple steps:Step 1. Go to the Bitget website and click on the "Log in" button, typically found in the upper right-hand corner of the page.
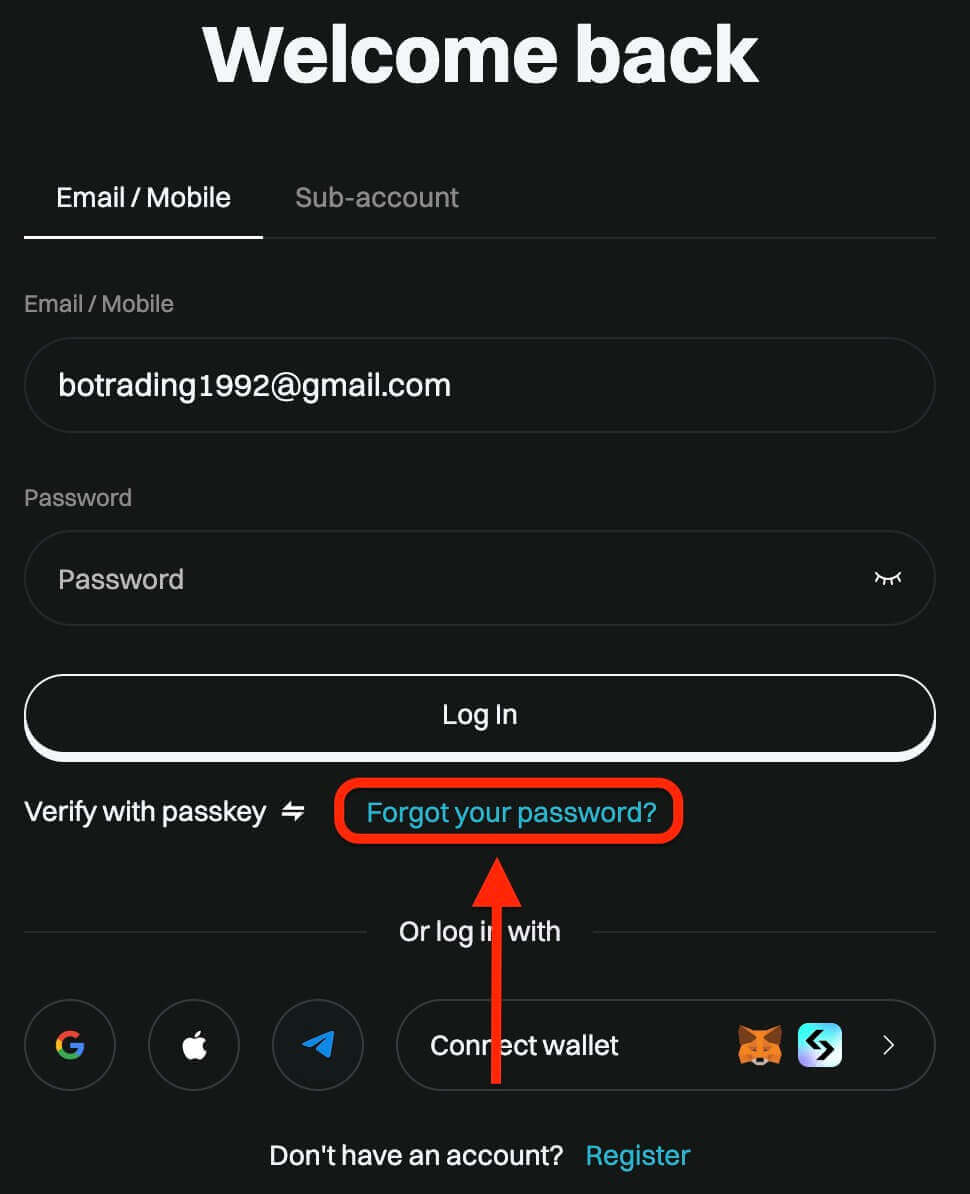
Step 2. On the login page, click on the "Forgot your password?" link below the Log In button.
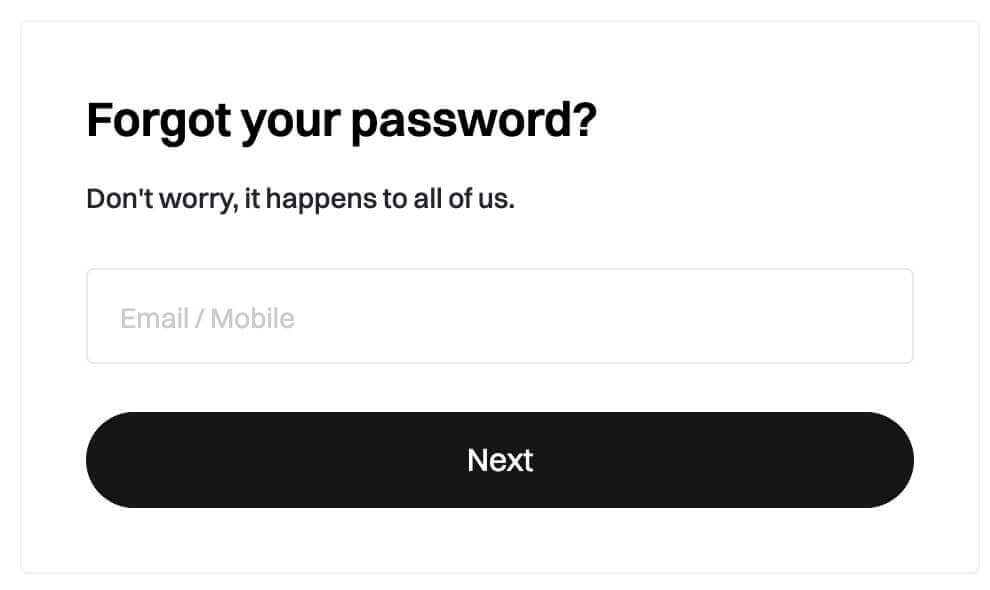
Step 3. Enter the email address or phone number that you used to register your account and click on the "Next" button.
Step 4. As a security measure, Bitget may ask you to complete a puzzle to verify that you are not a bot. Follow the instructions provided to complete this step.
Step 5. Enter your new password a second time to confirm it. Double-check to ensure both entries match.
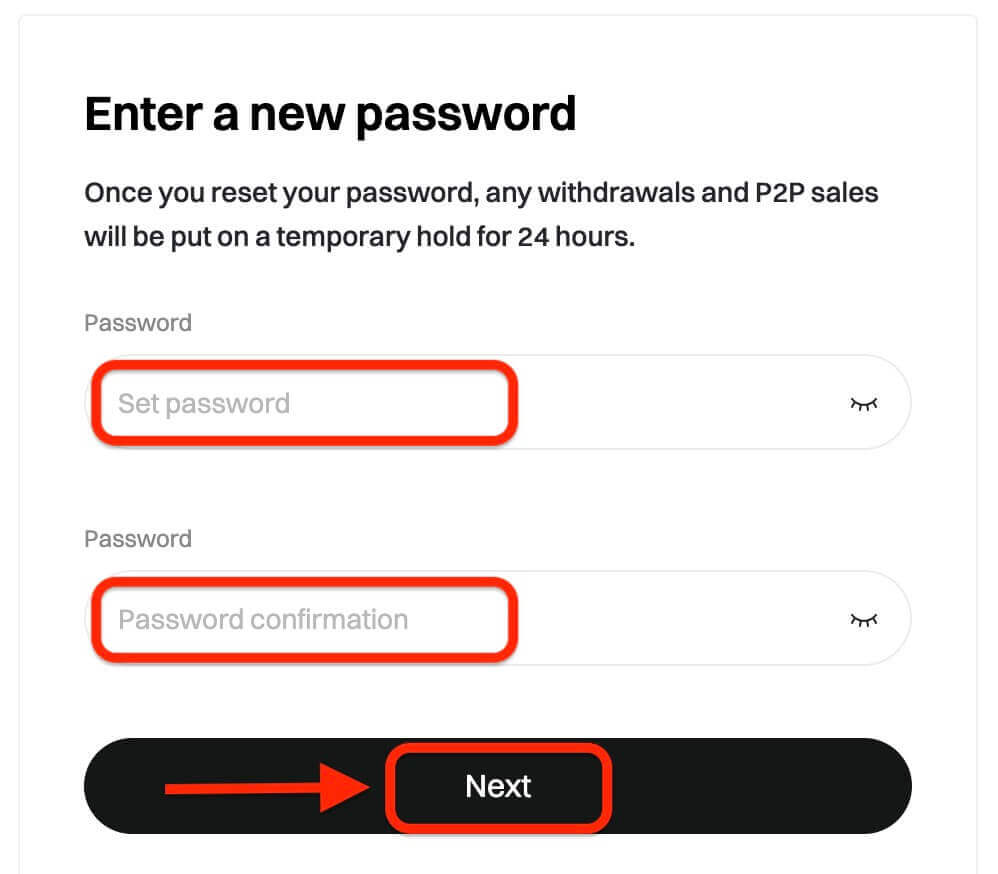
Step 6. You can now log in to your account with your new password and enjoy trading with Bitget.
How to Verify your Account on Bitget
What documents can I submit for identity verification?
Level 1: ID card, passport, driver’s license, and proof of residence.Level 2: Bank statements, utility bills (within the last three months), internet/cable/home phone bills, tax returns, council tax bills, and government-issued proof of residence.
How to Complete Verification on Bitget
Account Verification on Bitget Website
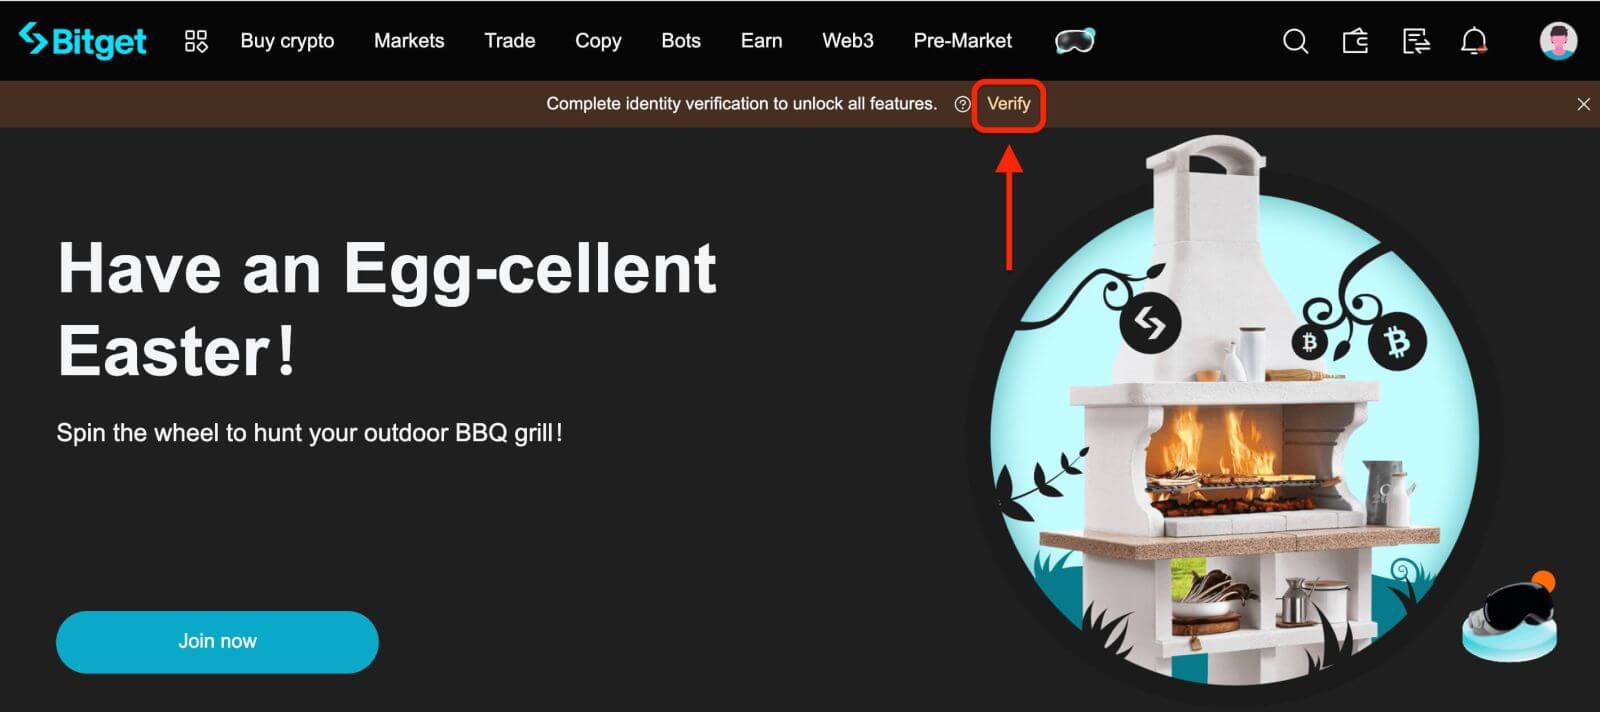
Verifying your Bitget account is a simple process that involves providing personal information and verifying your identity.1. Log in to your Bitget account, click on [Verify] on the main screen.
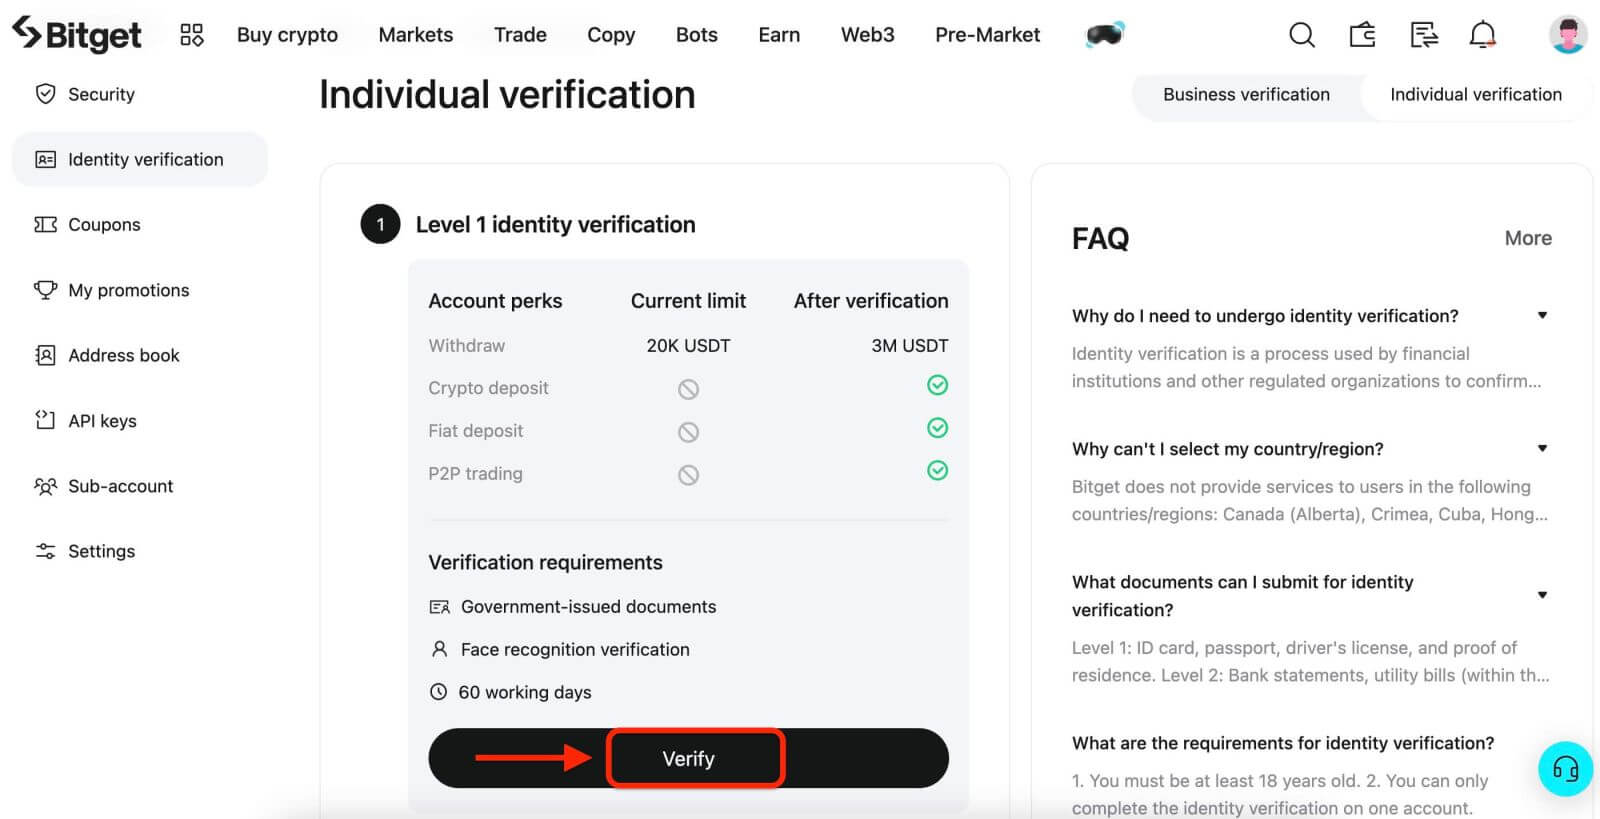
 2. Here you can see [Individual Verification] and their respective deposit and withdrawal limits. Click [Verify] to start the verifying process.
3. Select your country of residence. Please ensure that your country of residence is consistent with your ID documents. Choose the type of ID and the country your documents were issued. Most users can choose to verify with a passport, ID card, or driving license. Please refer to the respective options offered for your country.
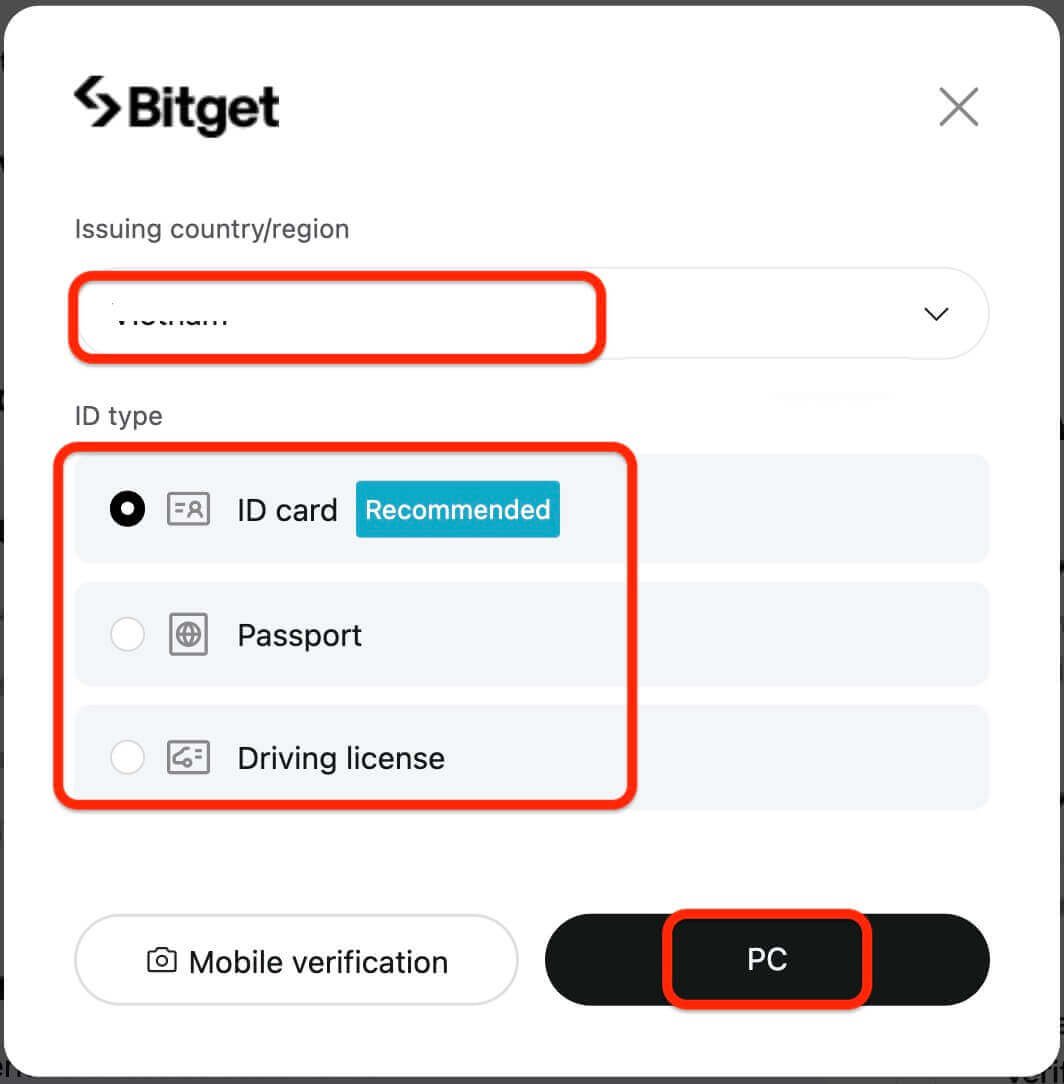
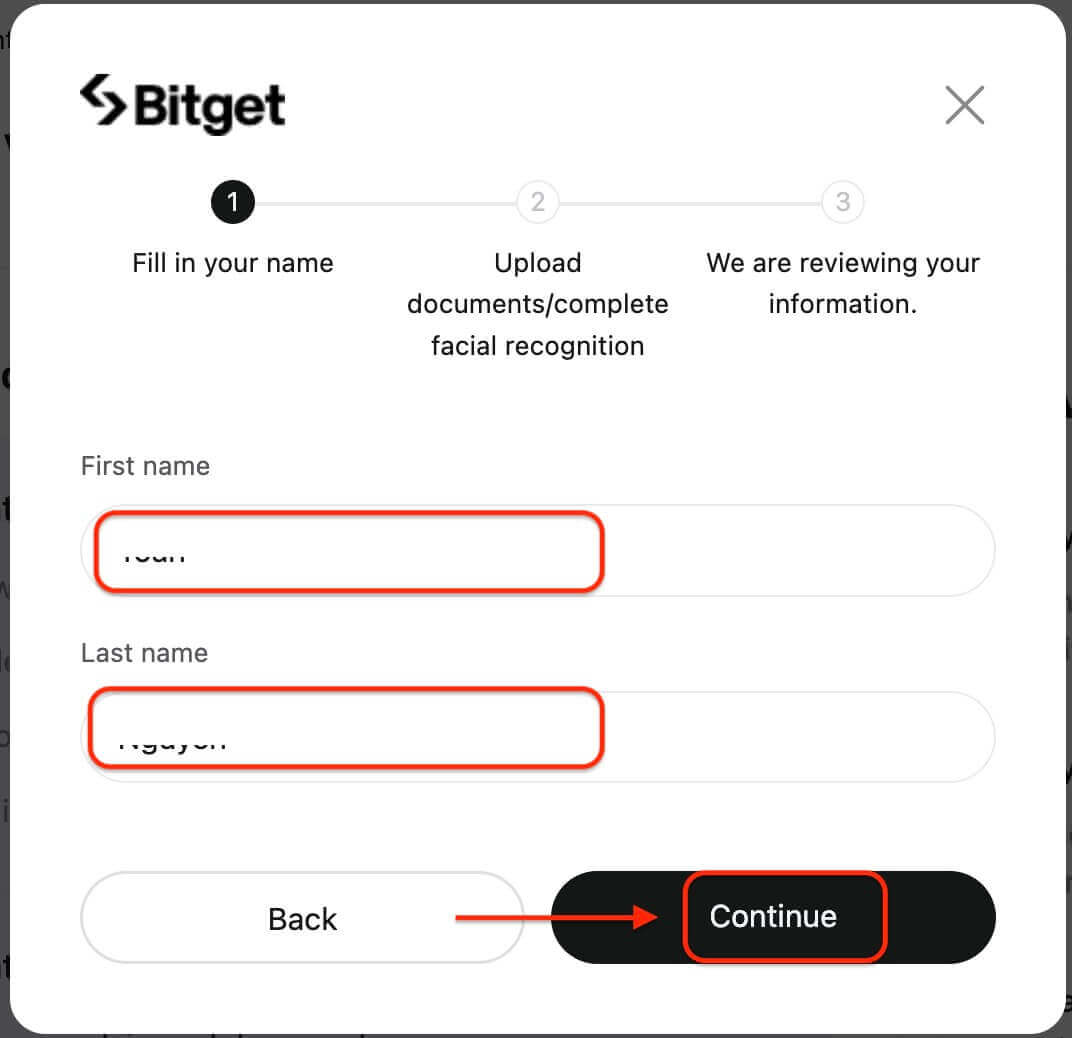
4. Enter your personal information and click [Continue].
If you wish to continue using the mobile version, you can click on [Continue on phone]. If you want to continue using the desktop version, click on [PC].
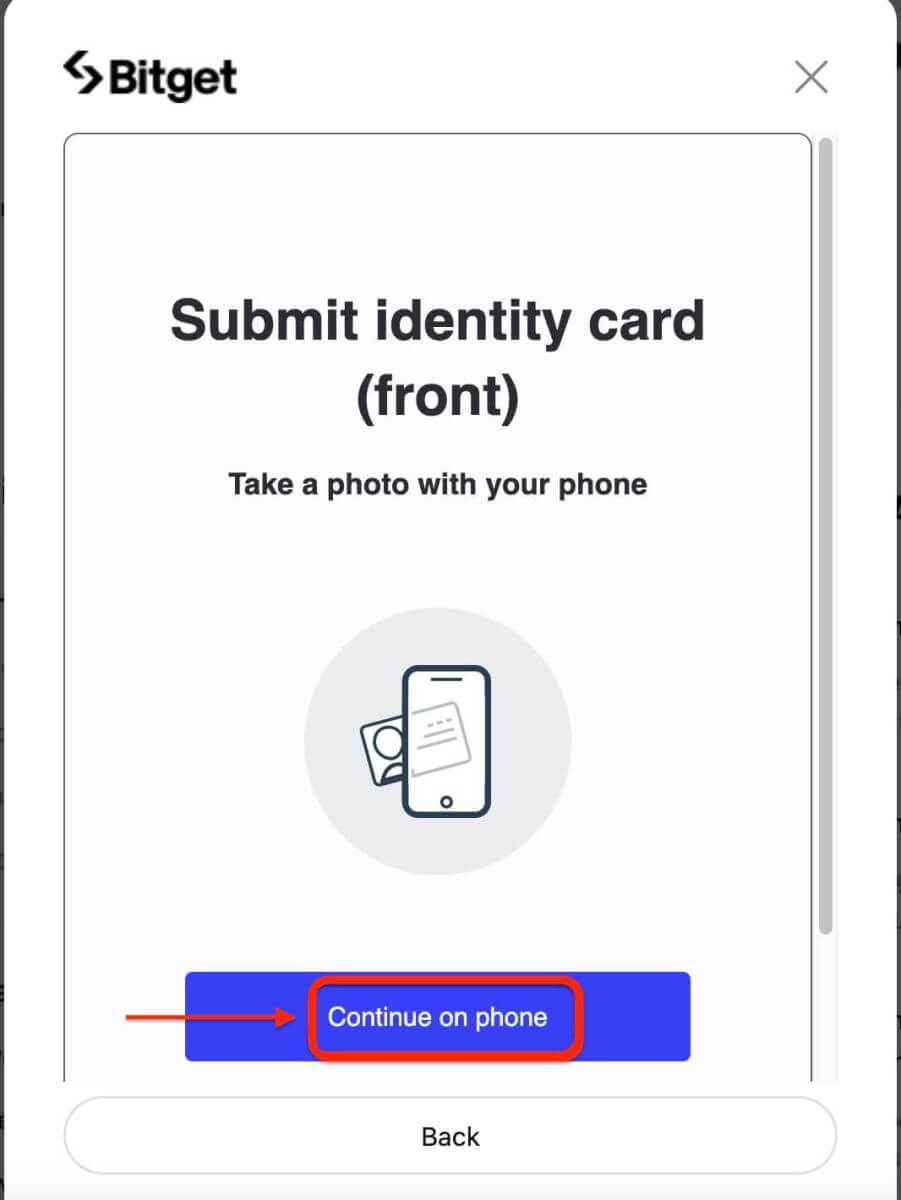
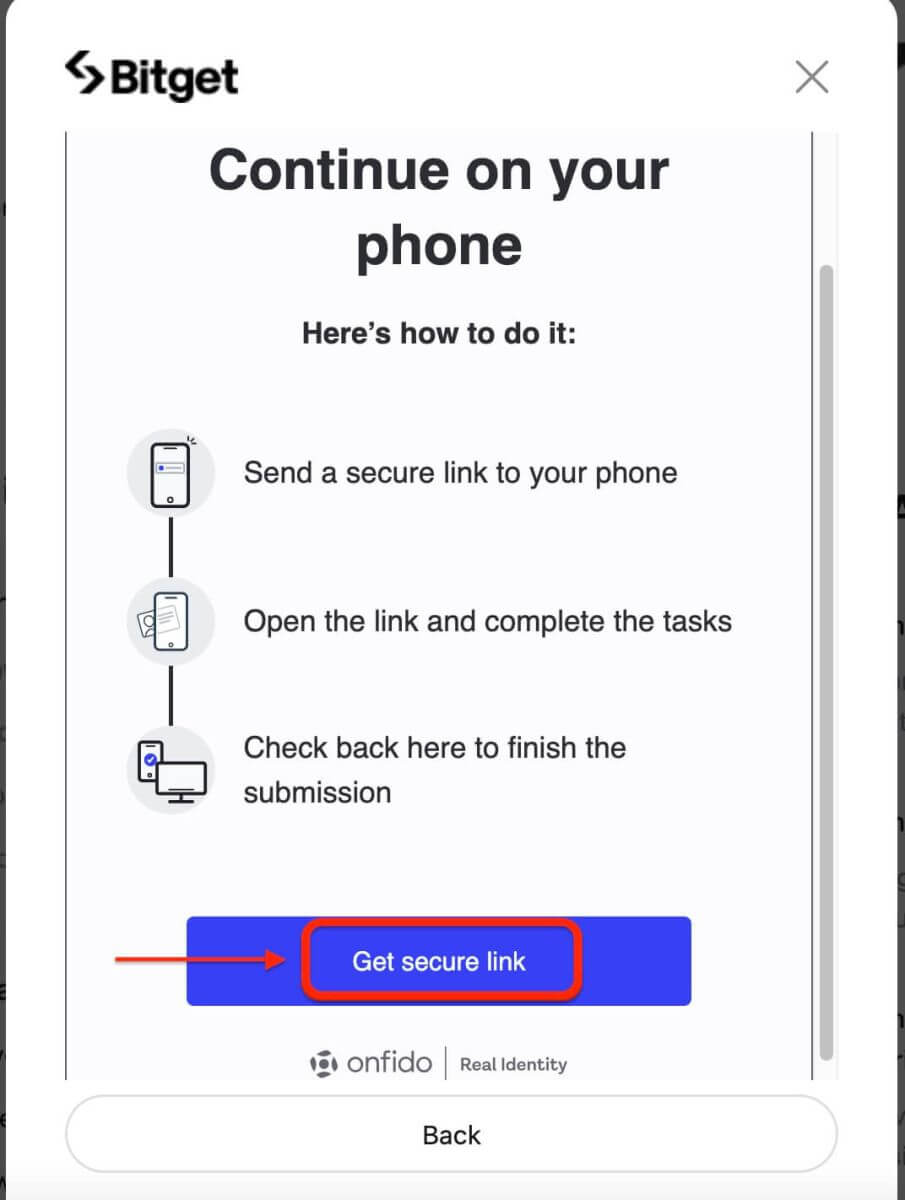
5. Upload a photo of your ID. Depending on your selected country/region and ID type, you may be required to upload either a document (front) or photo (front and back).
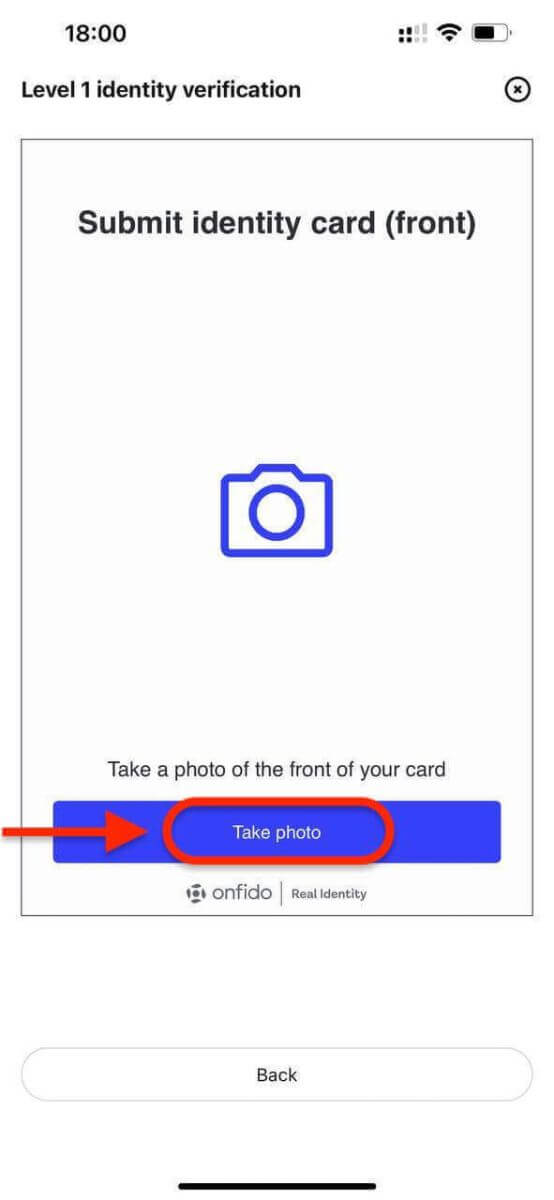
Note:
- Make sure that the document photo clearly displays the user’s full name and date of birth.
- Documents must not be edited in any way.
6. Complete facial recognition.
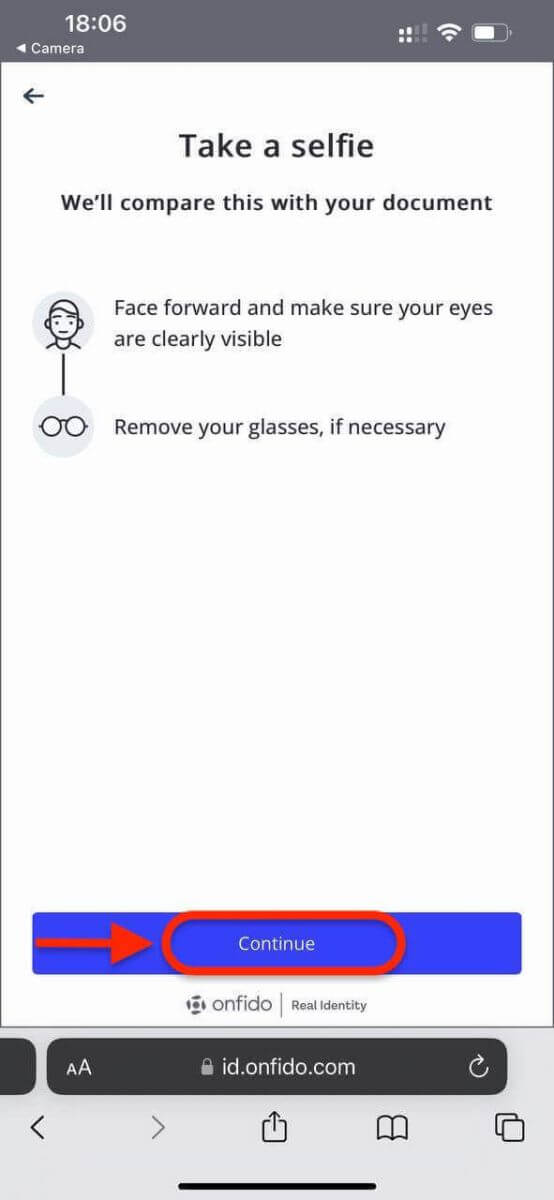
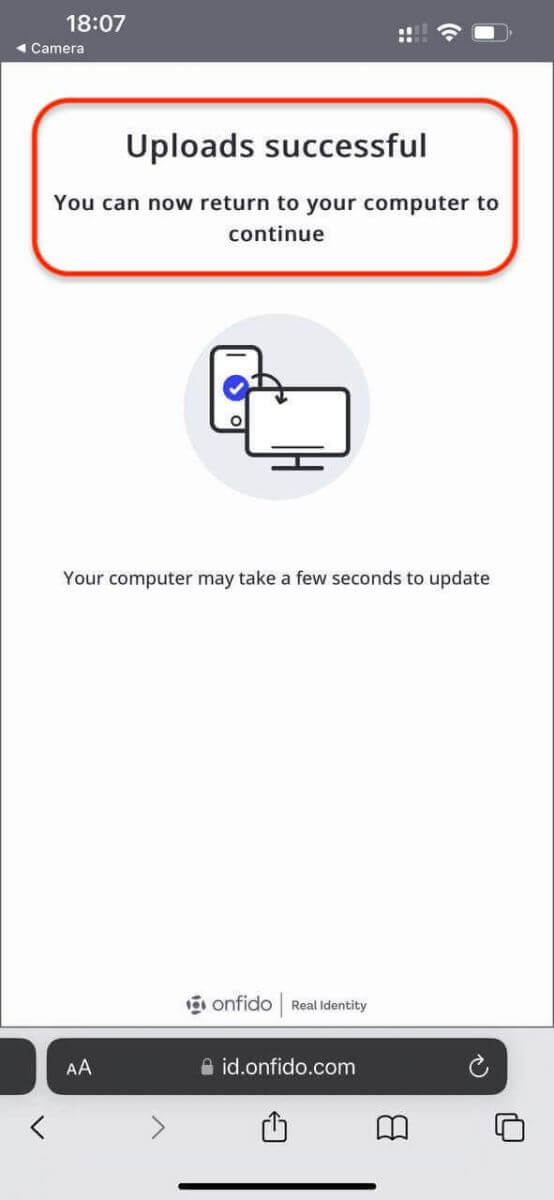
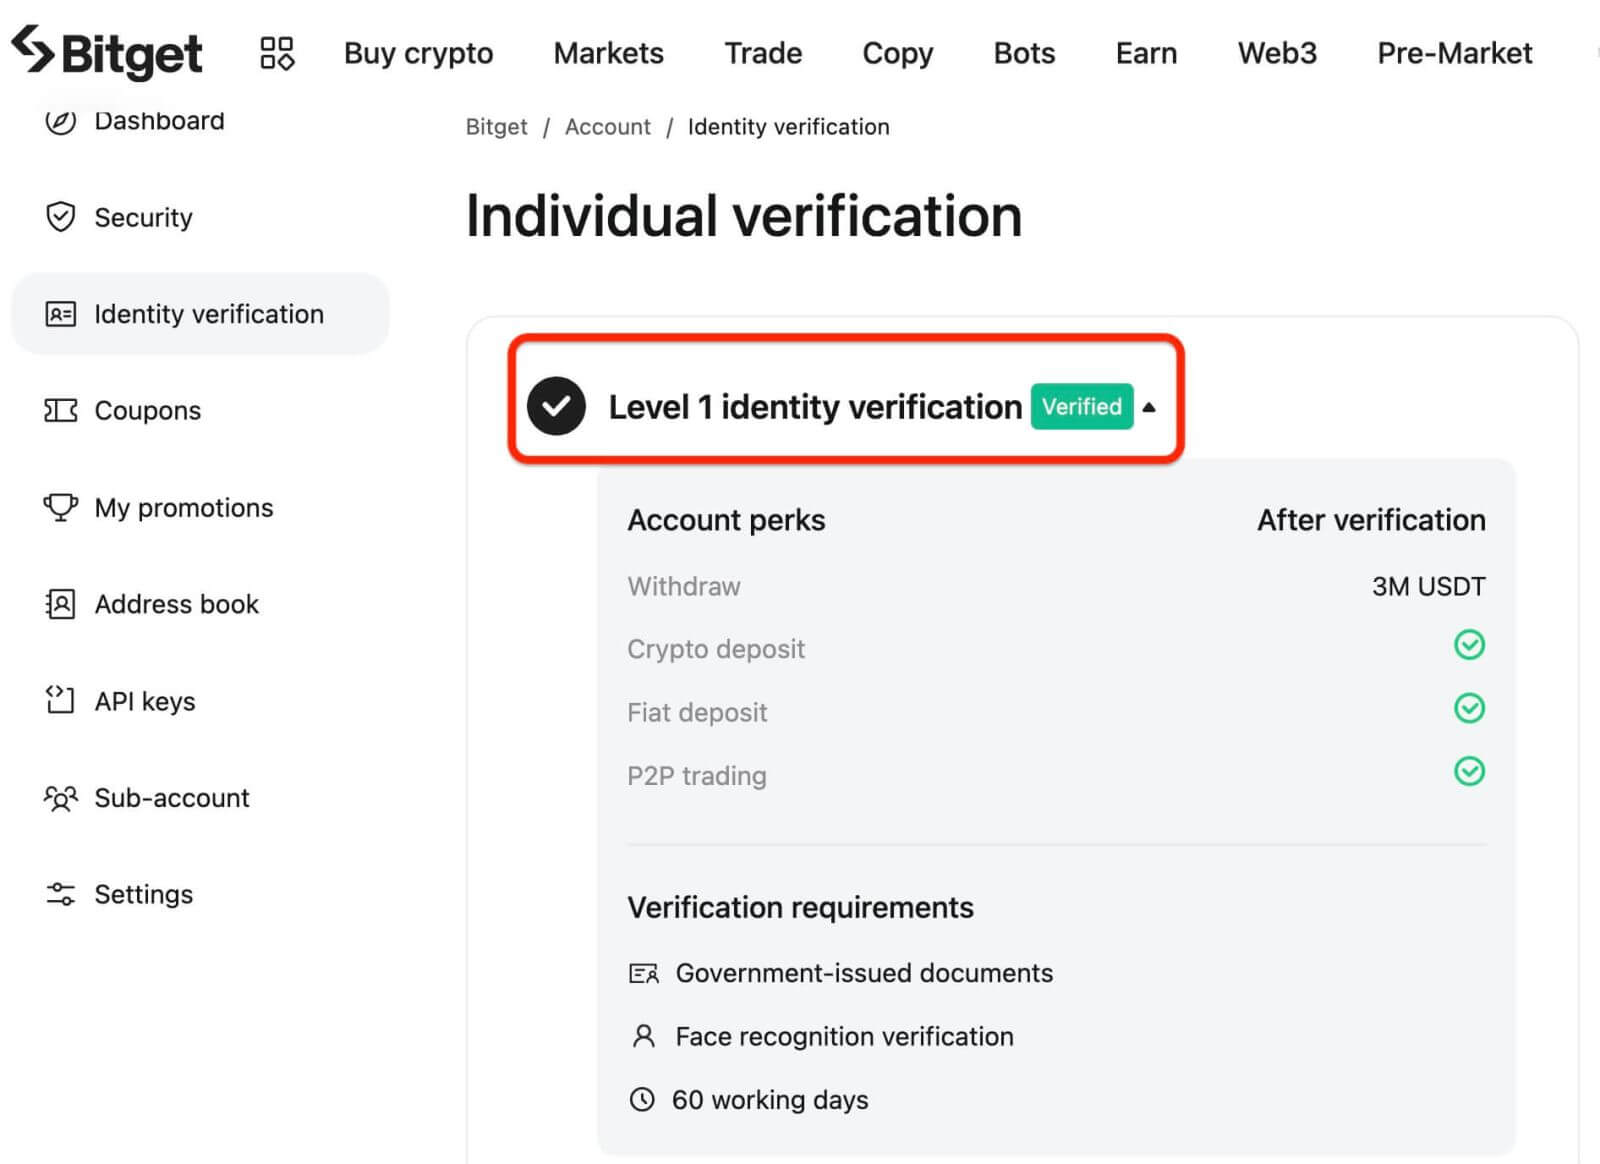
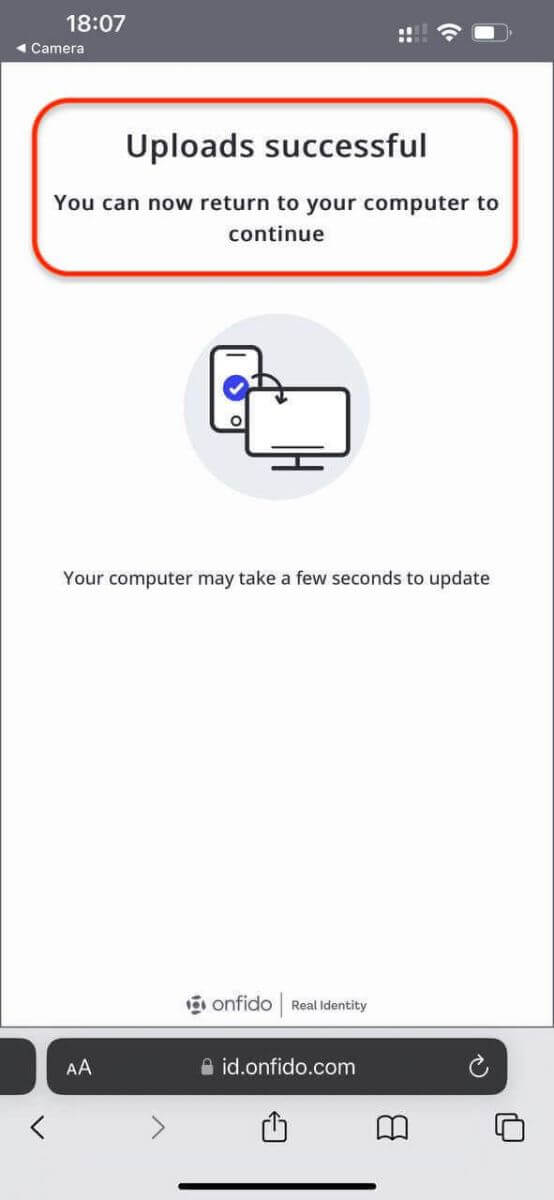
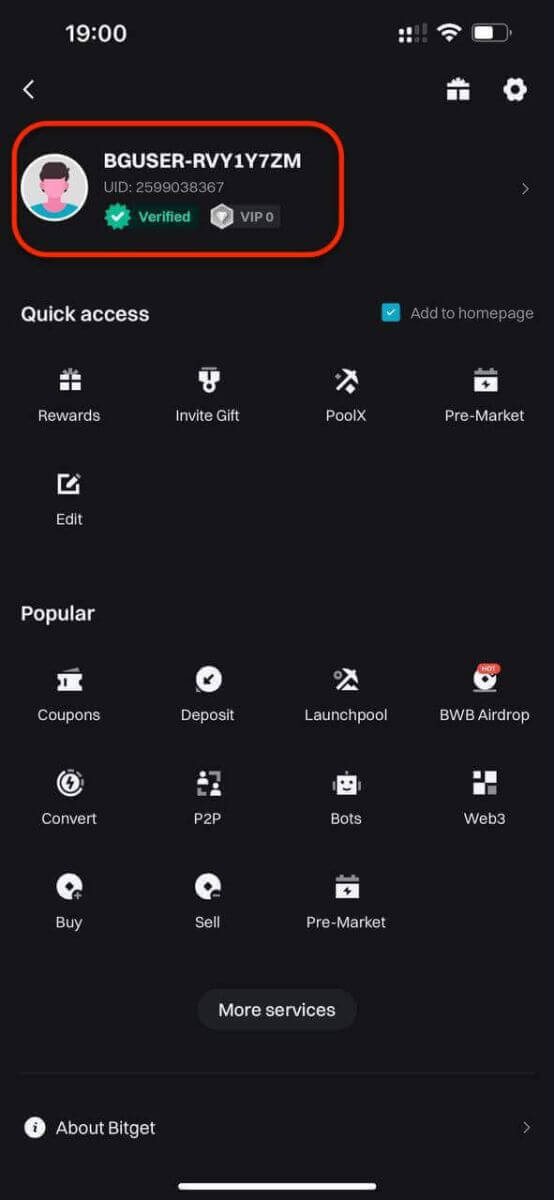
7. After completing the facial recognition verification, please patiently wait for the results. You will be notified of the results by email and or via your website inbox.
Account Verification on Bitget App
Verifying your Bitget account is a simple and straightforward process that involves providing personal information and verifying your identity.1. Log in to the Bitget app. Tap this line on the main screen.
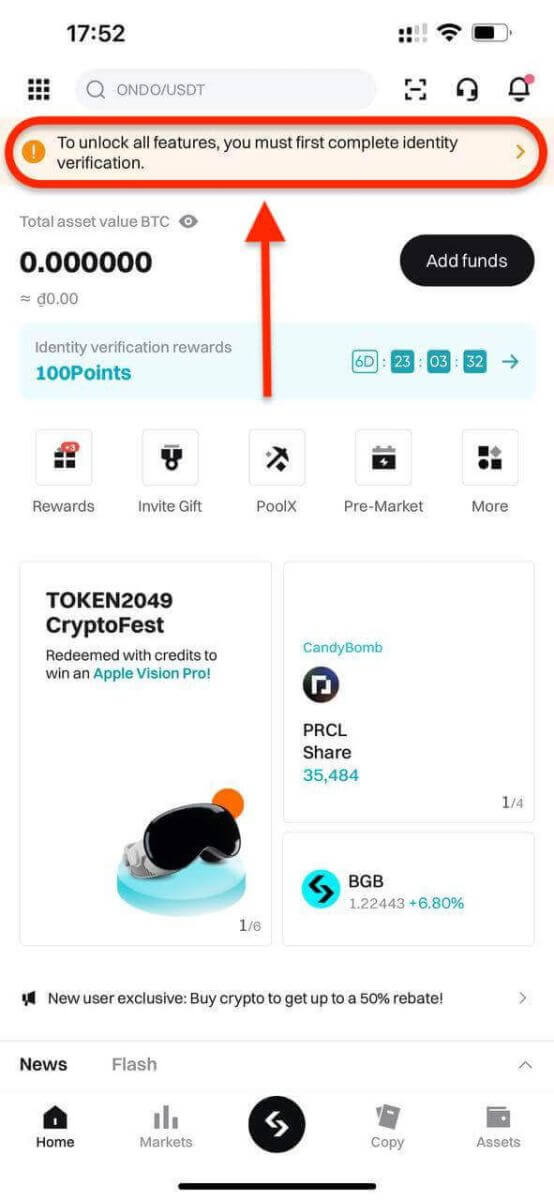
2. Click [Verify] to start the verifying process.
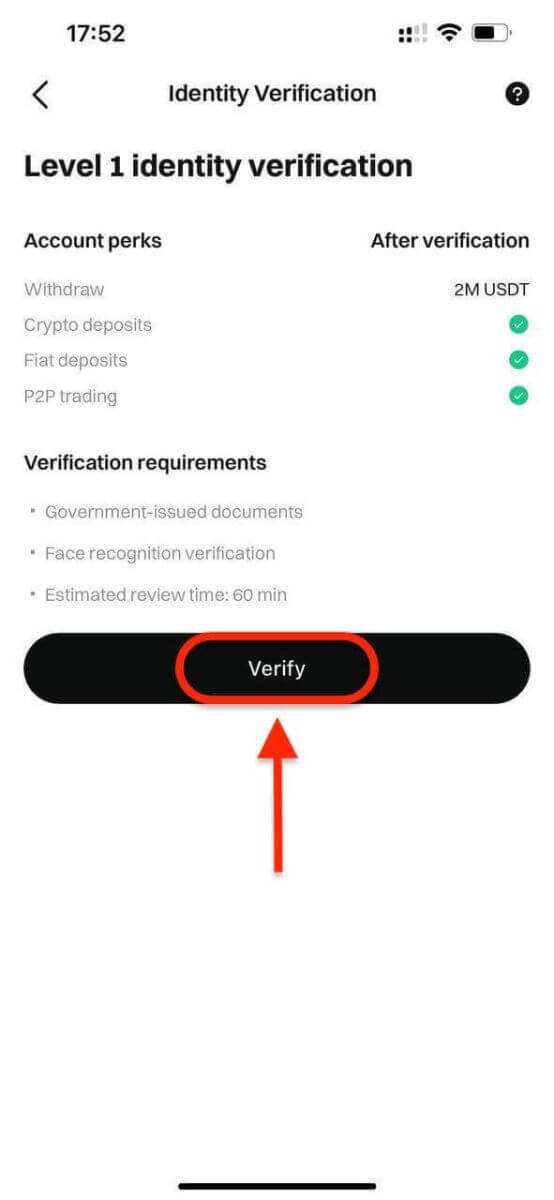
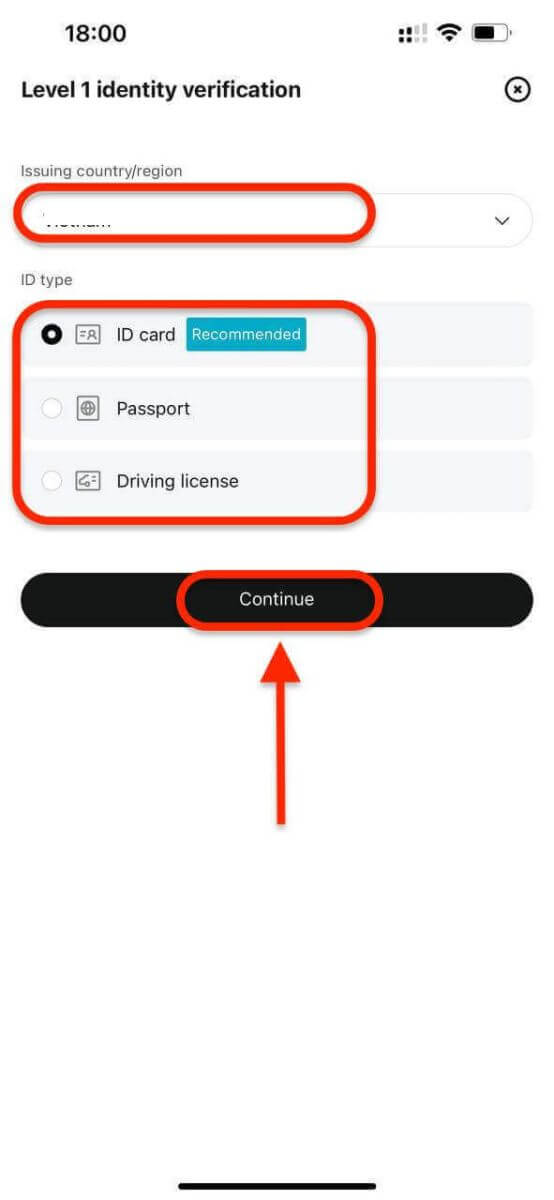
3. Select your country of residence. Please ensure that your country of residence is consistent with your ID documents. Choose the type of ID and the country your documents were issued. Most users can choose to verify with a passport, ID card, or driving license. Please refer to the respective options offered for your country.
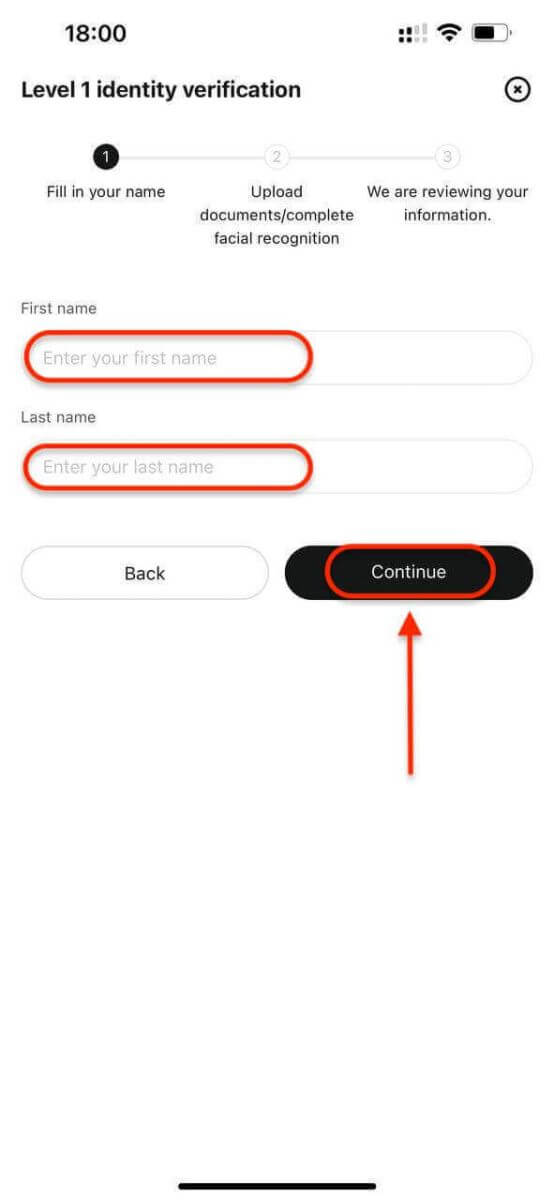
4. Enter your personal information and click [Continue].
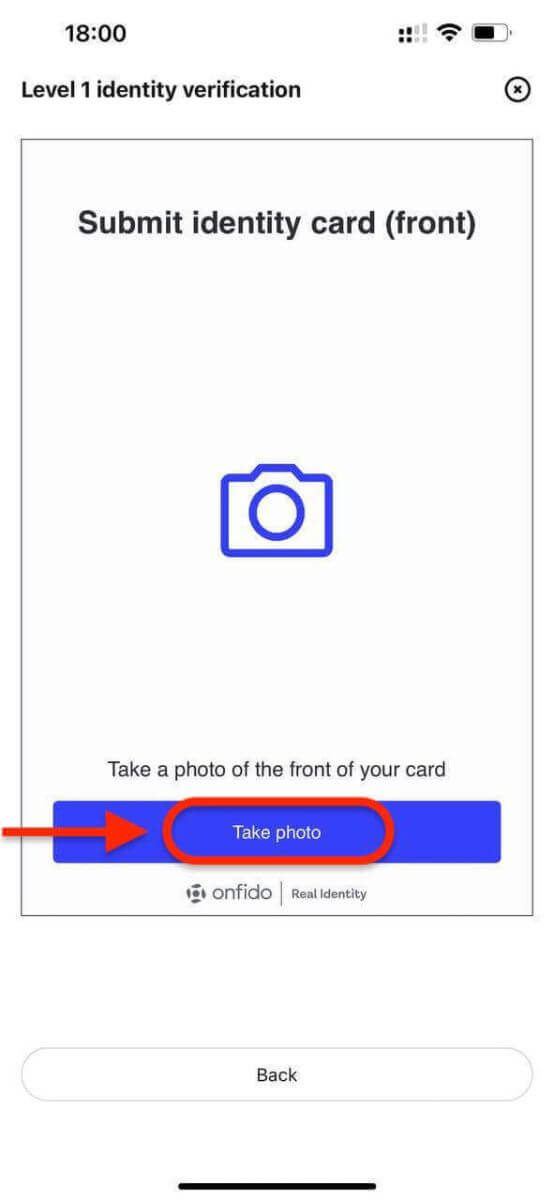
5. Upload a photo of your ID. Depending on your selected country/region and ID type, you may be required to upload either a document (front) or photo (front and back).
Note:
- Make sure that the document photo clearly displays the user’s full name and date of birth.
- Documents must not be edited in any way.
6. Complete facial recognition.
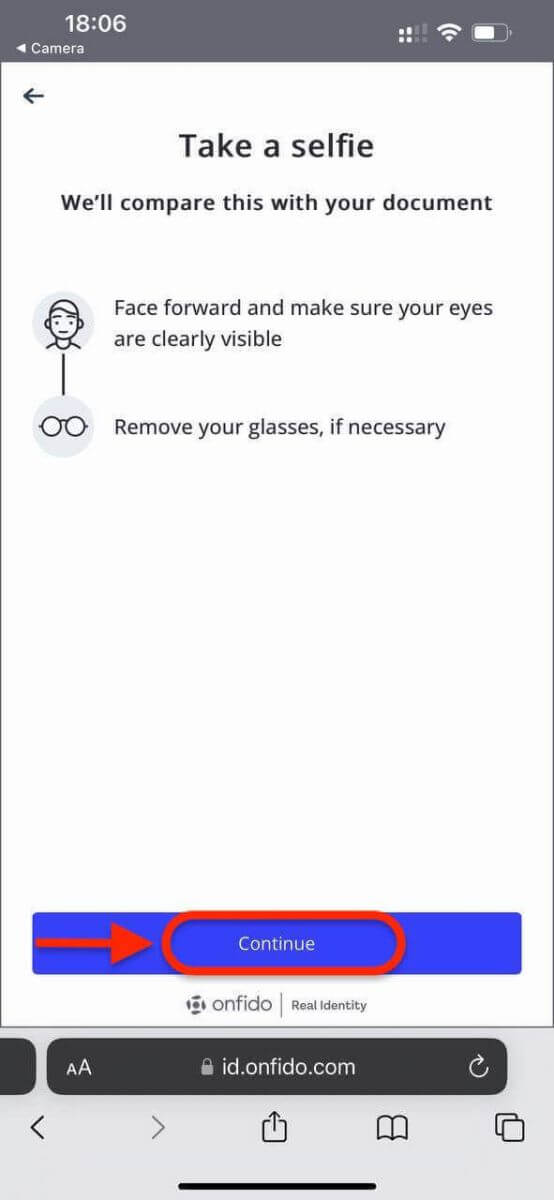
7. After completing the facial recognition verification, please patiently wait for the results. You will be notified of the results by email and or via your website inbox.
How long does the identity verification process take on Bitget?
The identity verification process consists of two steps: data submission and review. For data submission, you only need to take a few minutes to upload your ID and pass the face verification. Bitget will review your information upon receipt. The review may take as short as several minutes or as long as an hour, depending on the country and type of ID document you choose. If it takes longer than one hour, contact customer service to check the progress.
How much can I withdraw per day after completing the identity verification?
For users of different VIP levels, there is a difference in the withdrawal amount after completing identity verification:


